How to Share Your Reviews Using Review Widget?
Introduction
Customer reviews serve as a dynamic way to build social proof and enhance customer trust. From e-commerce stores aiming to increase sales to service-based businesses seeking to establish trust, reviews help leverage customer experiences to drive engagement and foster loyalty.
Marketers have made it into a regular practice to showcase them using widgets on their websites where people can see them. Widgets are great for displaying reviews from authentic platforms such as Google and Facebook.
SocialPilot Reviews helps you create review widgets that seamlessly integrate into your web pages to collect, curate, and display reviews in visually engaging formats. Additionally, these widgets come with customization options, enabling brands to match the design with their website’s aesthetics and reinforce their identity.
In this guide, we will explain in detail the process of creating review widgets within SocialPilot Reviews and customizing them in different ways.
You can also check out this quick and easy walkthrough video to see how it's done:
In This Article
- How to Create Widgets?
- How to Manage Negative Reviews with the Feedback Page?
- How do I Embed a Widget on My Website?
How to Create Widgets?
Follow these steps to design review widgets with SocialPilot Reviews:
- Log in to your SocialPilot Reviews account.
-
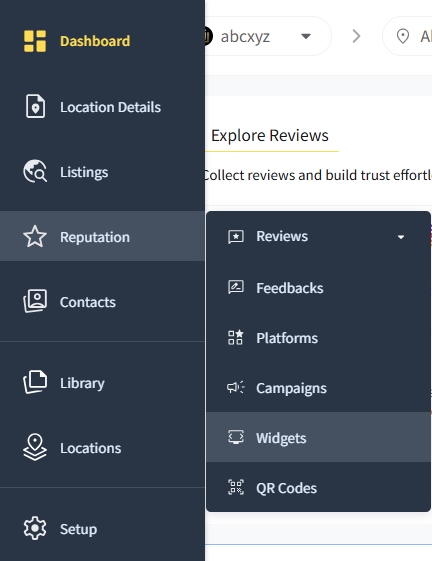
Navigate to “Reputation” on the left menubar and select Widgets.
- Select the brand and location for which you want to create the widget for.
-
Click on the Create Widget button to get to the widget creation page and get started.


Basic Settings
These specifications are present in all or most types of widgets:
-
Change the Name of the widget from the system-generated default name if you want to rename it.
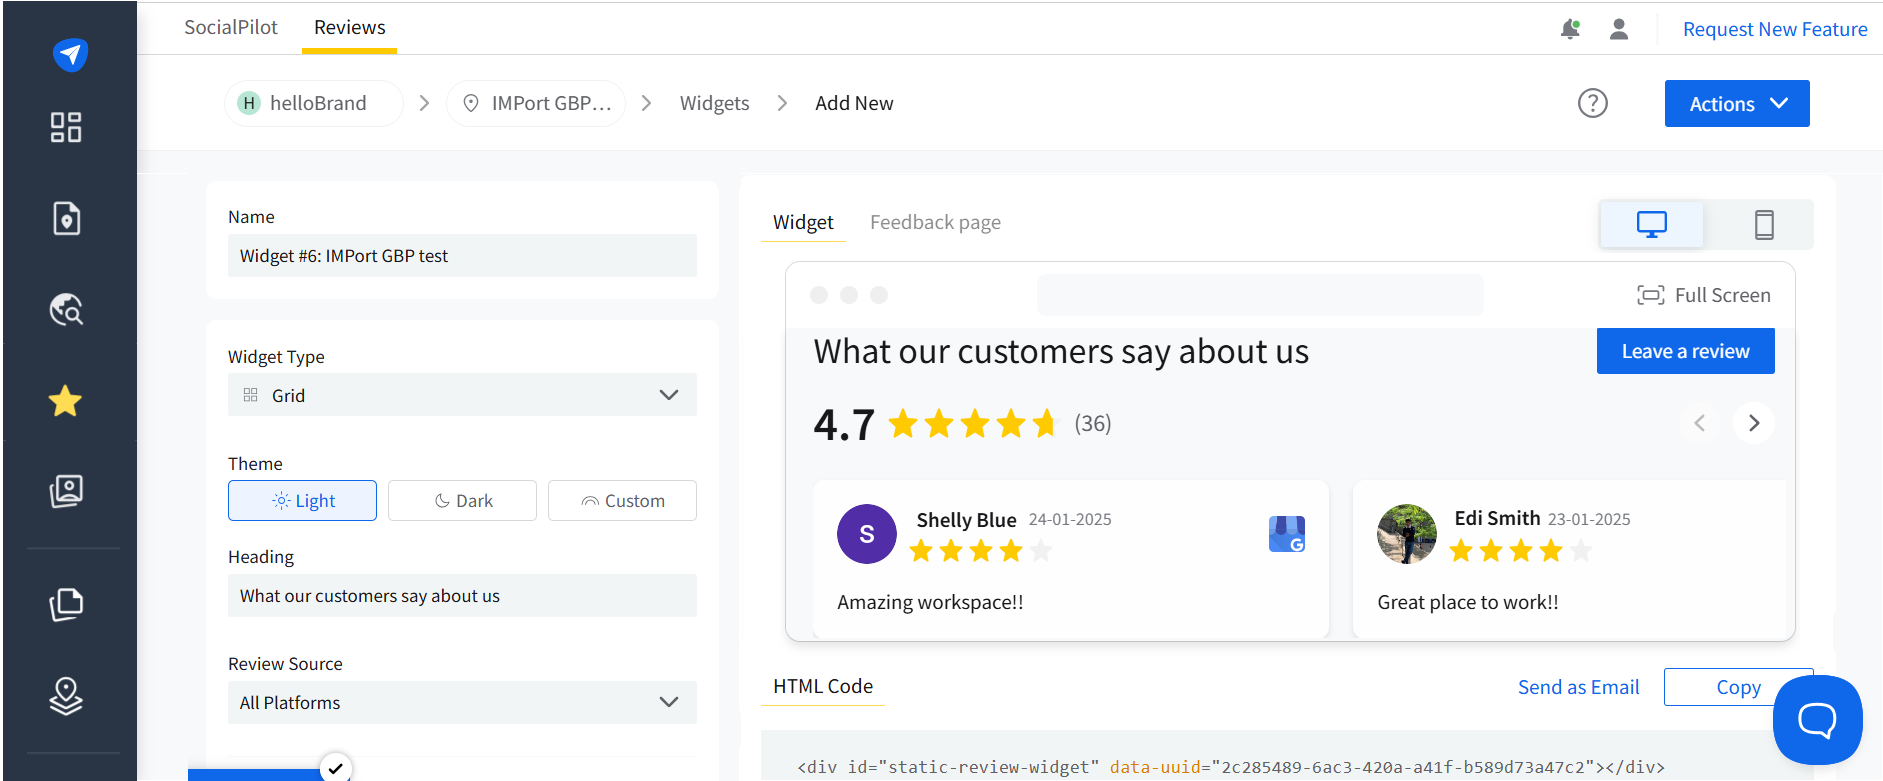
- Next, choose the Type from the six available options.

- Grid
- List
- Review Button
- Average Rating Badge
- Carousel
- Floating Slides

-
Now, you have to select a Theme (Light, Dark, or Custom).
Custom Theme: Under the Custom option, there are four options for which you can choose the color:
- Card Background
- Text
- Button Background
- Button Text

‼️ Note: Although Custom Theme is an available option for all widget types, all four custom color options are not.
-
You can use Custom CSS to completely redesign the look of the widgets. Click on the toggle to access the CSS window.

Once the code window opens, you can take the cursor to hover over the color codes. This will open up the color picker from where you can select any of the available shades for the elements in your widgets.

You can restore the widget's default aesthetics by clicking "Reset."
-
Give a Heading, which will be the main title displayed on the widget. This field is named Button Label for the Review Button widget and is unavailable for the Floating Slide.

-
The next custom option is the Review Source. Choose platforms (Google, Facebook, or both) to fetch reviews. It is not available for the Button widget type.

-
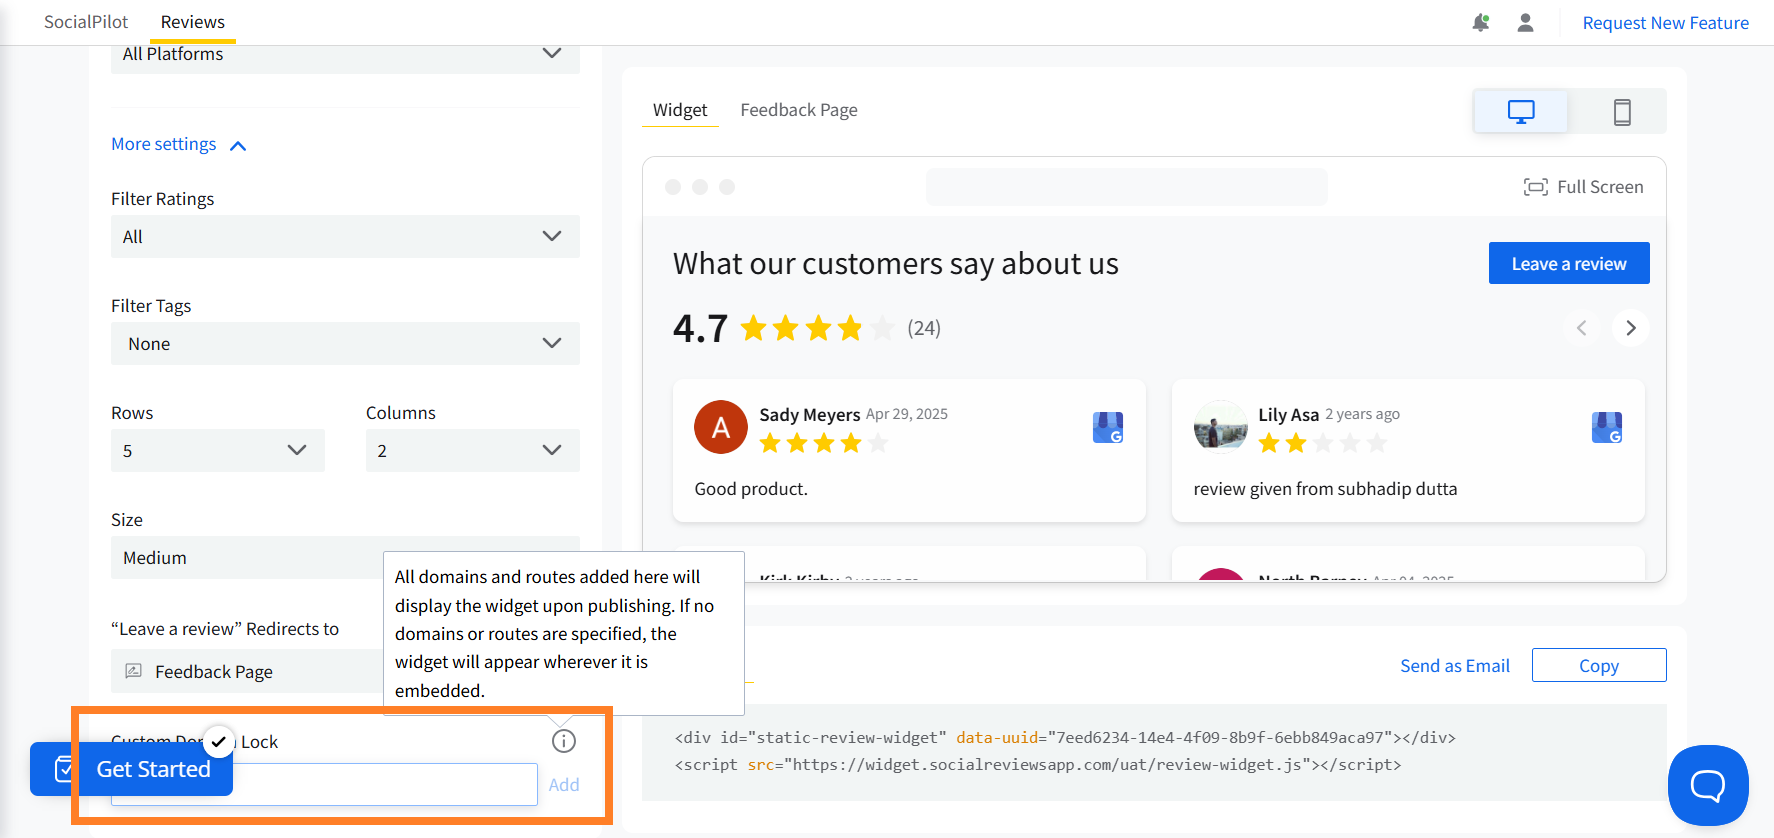
Now, click on More Settings, to find Custom Domain Lock in the end, which is available for all widget types. You can add up to five domain URLs under this field. Adding domains here restricts the visibility of the widget to these websites and the one it has been embedded in.


🔒 Note: If Custom Domain Lock is enabled, people who have the link to the widget will not be able to publish it to any website other than the ones it's allowed in, preventing misuse.
-
Select an option for “Leave a review” Redirects to button. Clicking this button can lead the visitors to any of the connected platforms, including Facebook or Google Business Profile. The Feedback Page is a custom page you can create within the widget creator. Except for the Average Rating Badge and Floating Slides widgets, this option is available for all widget types.

-
Filter Items to filter reviews with a range of ratings ( stars) to show in the widget.

-
You can use Filter tags to make sure that reviews with only certain tags are visible when the widget is made live.


Note: This feature is not available for the Review Button and Average Rating Badge widget types.
Widget Type-Specific Settings
Below, we have listed customization options available for each Widget type.
I. Grid Widget:
- Theme (Card Background, Text, Button Background, and Button Text for Custom Theme)
- Custom CSS Theme
- Heading
- Review Source
- Filter Items
- Filter Tags
- Rows (1–10) and Columns (1–5)
- Size
- Leave a Review button
- Custom Domain Lock

II. List Widget:
- Theme (Card Background, Text, Button Background, and Button Text for Custom Theme)
- Custom CSS Theme
- Heading
- Review Source
- Filter Items
- Filter Tags
- Rows (1–10)
- Size
- Leave a Review button
- Custom Domain Lock

III. Review Button Widget:
- Custom (Button Background and Button Text for Custom Theme)
- Custom CSS Theme
- Button Label
- Review Button Redirects to
- Size
- Icon (preferably matching the “Redirect to” button)
- Custom Domain Lock

IV. Average Rating Badge Widget:
- Theme (Card Background and Text for Custom Theme)
- Custom CSS Theme
- Review Source
- Show Reviews Count checkbox
- Size
- Shape: Circle, Square, or Star
- Show Stars (checkbox)
- Show Platform Icon (checkbox)
- Custom Domain Lock

V. Carousel Widget:
- Theme (Card Background, Text, Button Background, and Button Text for Custom Theme)
- Custom CSS Theme
- Heading
- Review Source
- Filter Items
- Filter Tags
- Size
- “Leave a review” Redirects to
- Auto Slide Speed: Fast, Medium, Slow, or None
- Cards (per slide: Single or Multiple)
- Interactions: Enable or disable Arrow
- Custom Domain Lock

VI. Floating Slides Widget:
- Theme (Card Background and Text for Custom Theme).
- Custom CSS Theme
- Position: the placing of the widget on the screen (e.g., Top Left, Bottom Right)
- Review Source
- Show Review Text (uncheck or check to hide or display review content.)
- Filter items
- Filter Tags
- Size
- Custom Domain Lock

- When you are configuring all the specifics you can see a real-time preview as you design it. Available preview options include:
- Mobile preview (all types)
- Desktop preview (all types)
- Full-screen preview (for list, grid, and carousel widgets)

- Once your widget is ready, there are a few actions you can choose from. So go to the Actions button at the top-right corner of the screen and select any of the two options.
- Save Draft: This will save the widget as you have created, and you can edit it again.
-
Publish: This will make the widget live and functional.


✅ Note: If you have published a widget, you can’t make changes to it as the editing options would be disabled. To edit a published widget, you have to unpublish it, edit it, and then publish it again.
How to Manage Negative Reviews with the Feedback Page?
You can have a convenient way of filtering negative reviews by using the Feedback page to redirect reviewers to a space where they can voice their problems. This proves to be a vital tool to manage the overall reputation of your business on all review platforms.
If you choose the “Feedback Page” to redirect the visitors to (in the “Leave a review” Redirects to dropdown), you can customize the page.
When you select the Feedback page in the “Leave a review” Redirects to the dropdown, the Feedback page editor becomes active.
Here are the things you can edit:
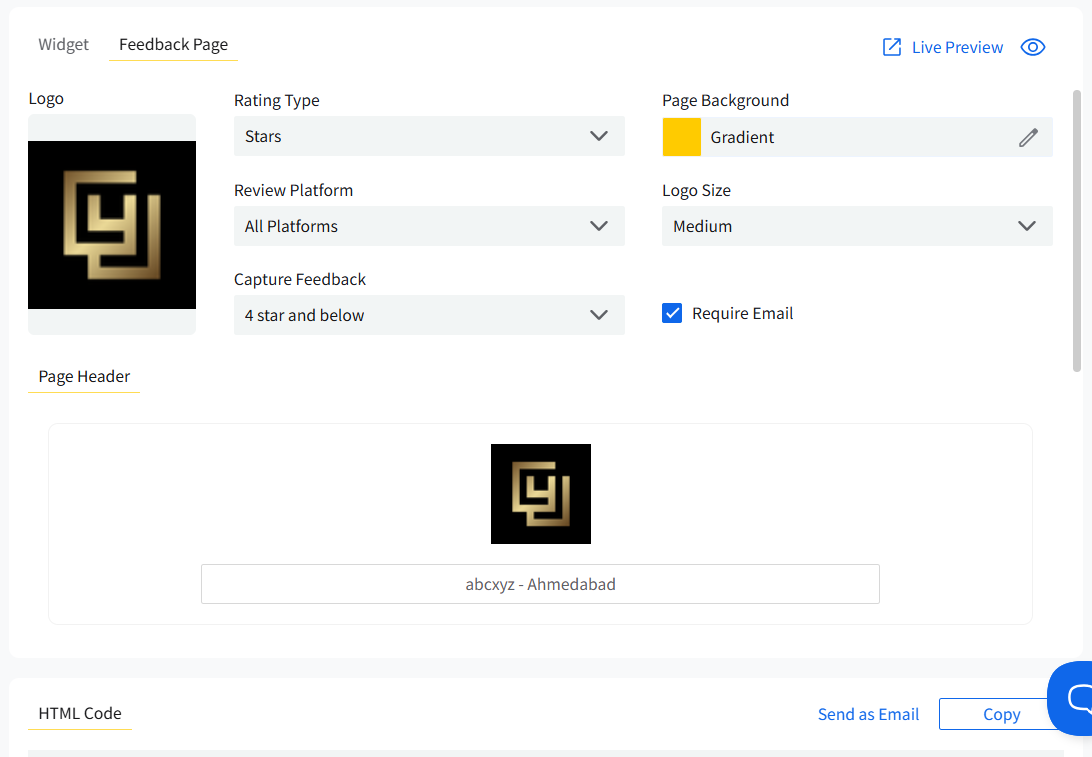
- Logo: Add and edit any image to serve as the logo of your page.
-
Logo Size: Select the size in which the logo will appear. You can select any of the given size options or opt for a custom size.

- Page Header: This appears as the heading of your Feedback page.
- Rating Type: Select the type of rating you want to offer the customer to give their feedback. Options include stars and thumbs-up/down.
- Capture Feedback: This defines the star rating limit you can set to manage reviews. If a visitor rates at or below the set star limit, they'll see the Capture Feedback page to share their written Feedback.
- Require Email: Select whether you want to make the addition of emails for users mandatory or keep them optional.
- Review Platforms: Select the platforms (connected to the location for which you have created the widget) to which you want to get the visitor’s review.
-
Background Color: Customize the background of your Feedback page by choosing between solid and gradient backgrounds with custom colors for a more branded experience.


Now, here is the reviewer’s journey through the Feedback page:
- Rating
- A custom text field with sample text. This message will appear just above the star rating field.
- Next is the star rating with its corresponding text representing its meaning.
-
Page Footer appears at the bottom of the page and will contain the address you have set for the location, but it is customizable.

- Capture Feedback
- This tab will show you the custom text fields that you have already filled under the Rating tab.
-
Under the Rating field you will see the field where reviewers will write their feedback message.

- Review Links
- If the reviewer rates you higher than the limit you have set in the Capture Feedback dropdown, they will be redirected to this page.
- It will have a Leave us a Review button. You can edit the text on the button.
- The tabs for the platforms you selected under Review Platform will appear as separate buttons here. If clicked, they will take the reviewer to the pages of your business on those respective platforms where they can give their reviews to your business.

- Thank You Page
- This is the last page the reviewer will see after giving their reviews.
- You can add a custom Thank You note here.

You can see a Live Preview link below the Logo Size field dropdown; clicking on it will show you the preview of the Feedback page as you have designed.

You have to unpublish the Widget to make changes in the Feedback page and publish it again for it to reflect on the website.
Up until this point, we have described how to create a widget and address negative reviews. Next, we will explain how to use it.
How do I Embed a Widget on My Website?
Follow these steps to embed a widget on your website:
-
Log in to your SocialPilot Reviews and navigate to the Widgets section.
-
If a widget already exists, click on it to embed it.
-
To make any widget functional, it must be published first, so make sure your widget is published and live.

-
Now, copy the provided HTML snippet.

- Open the source code of your website using your content management system (CMS) or HTML editor.
- Paste the copied HTML code into the desired section of your website's code.
-
Refresh your website to ensure the widget appears correctly.


Now that the review widget is up and running, you can start collecting user reviews and proactively contributing to your review generation campaigns.