How to Set Up Auto-Scheduling Queues?
SocialPilot offers advanced capabilities to its users so they can create content and schedule it for automated publishing on multiple social media platforms. Schedule queues are a vital part of the auto-publishing workflow in SocialPilot.
Schedule queues are timeslots allocated to each day of the week. When you create a post and add it to the queue, it automatically gets scheduled to be published in the next timeslot in the scheduling queue.
Every time you connect a social media account to the SocialPilot workspace, you can customize your schedule queue from the default queue the system provides.
We will take you through all there is to know about the schedule queue and its role in the automated scheduling and publishing process.
In this Article
- How To Set Up a Custom Schedule Queue for an Account?
- How To Create Queue Templates for Accounts?
- How To Apply a Queue Template to an Account?
- How To Apply a Queue Template to Multiple Accounts?
- How Does the Queue for an Account Work?
How To Set Up a Custom Schedule Queue for an Account?
After you connect a new account to SocialPilot, you will be redirected to the Manage Account page.
Here is how you can set up your own schedule queue:
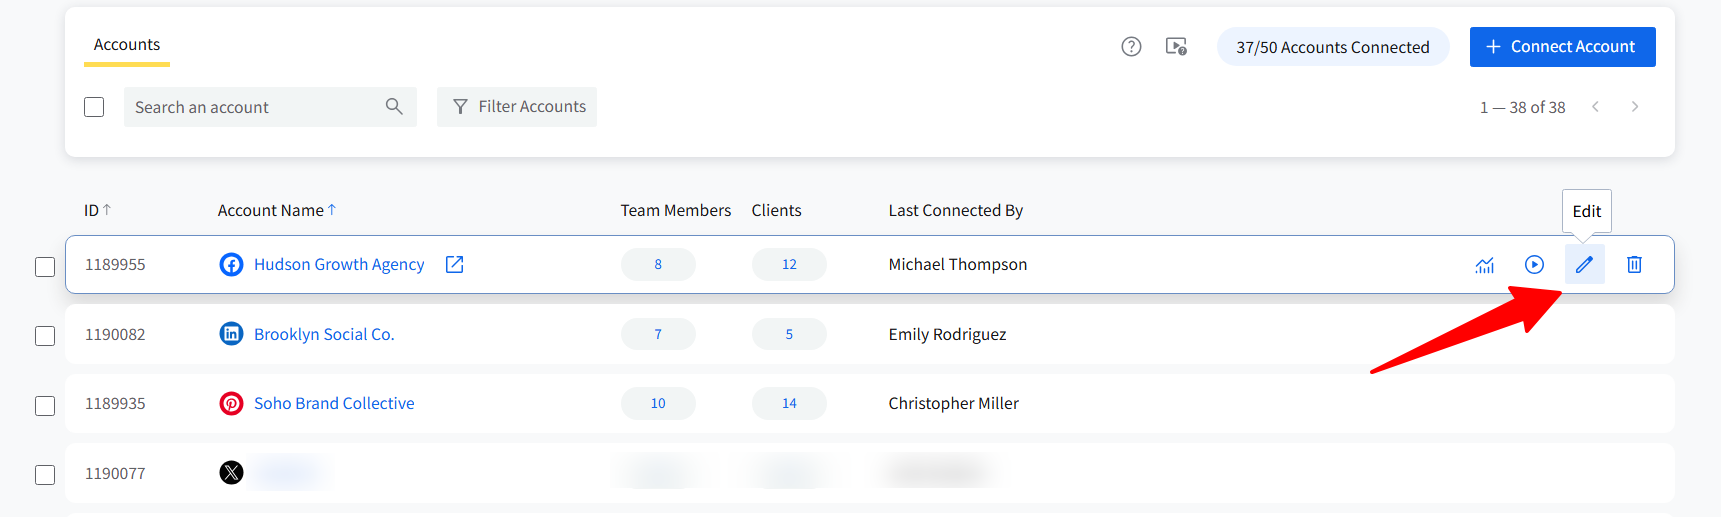
- Go to Accounts -> Manage Accounts.
-
Go to the account you want to set up a custom queue for and click on the Edit icon.
-
Ensure you are on the Schedule tab in the Edit Account page.
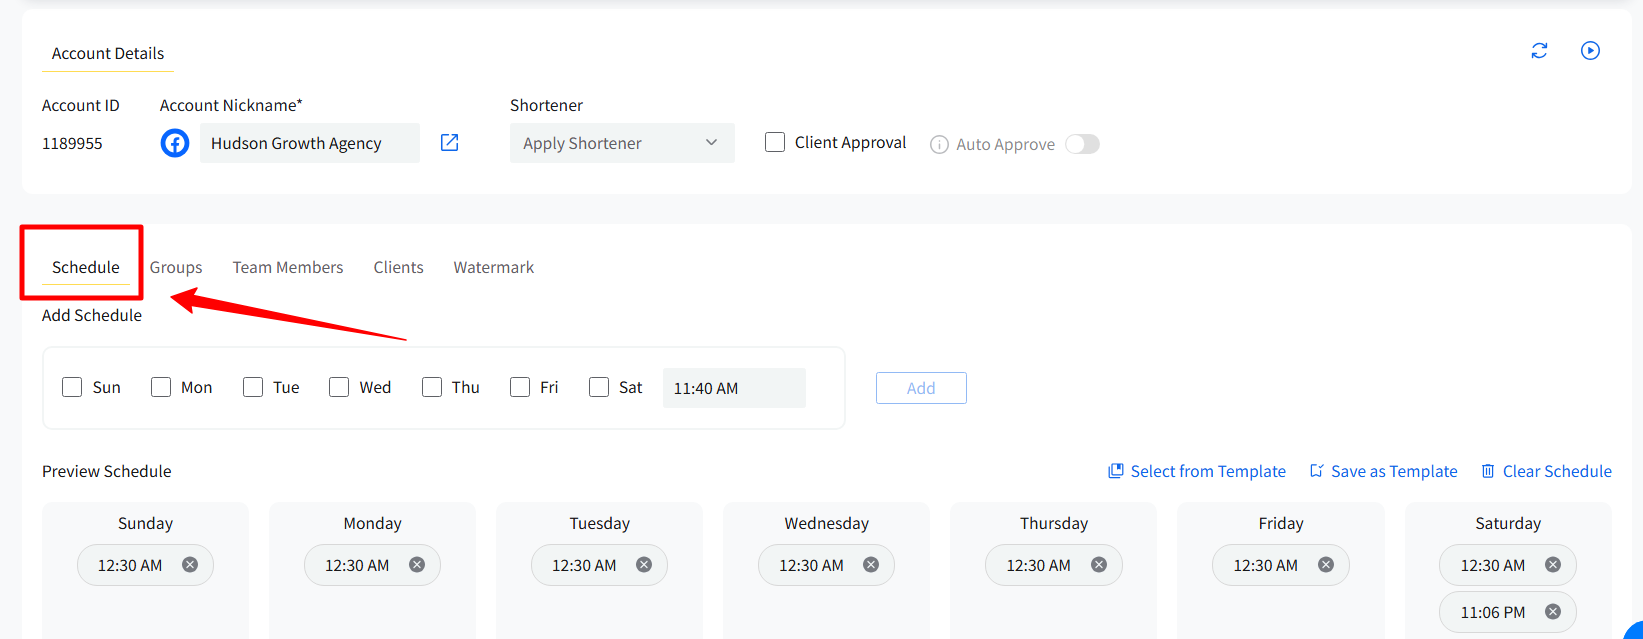
-
You will find all the weekdays listed above the queue list. Add any particular time of the day in the given field.
-
Check the boxes for the weekdays you want to add the new timeslot to the queue, and then click on Add.
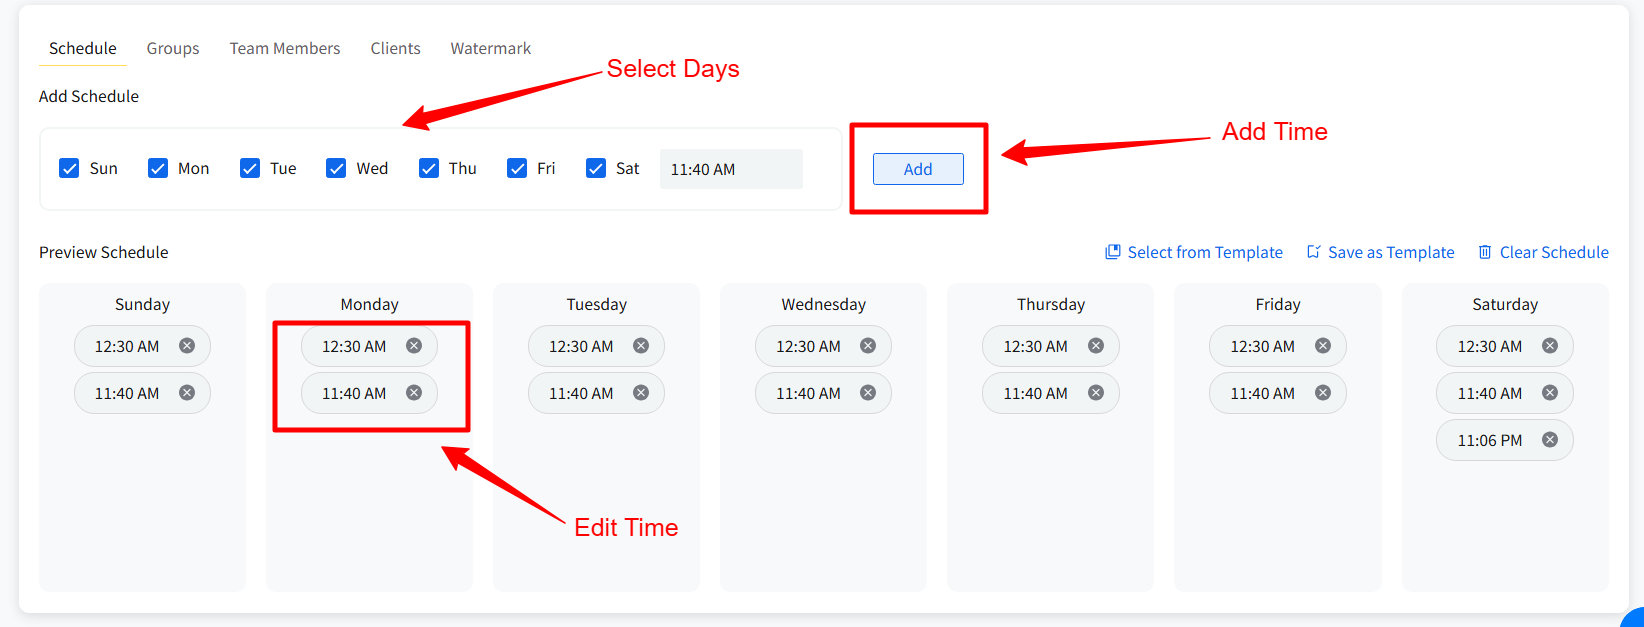
-
You can even remove individual timeslots from specific weekdays by clicking on the (x) beside them.
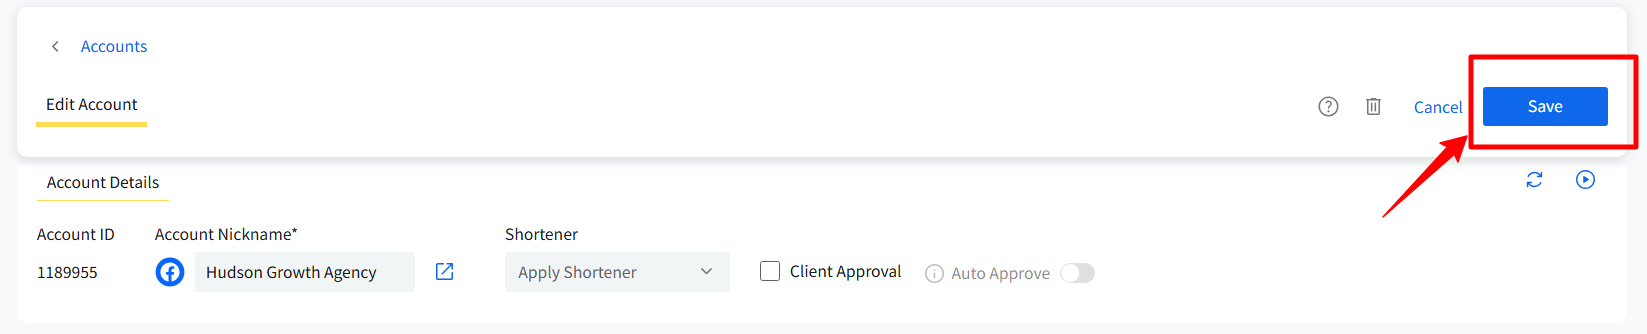
-
Once you are done making the changes, go to the top bar and click on Save.


How To Create Queue Templates for Accounts?
Rather than having to customize the schedule queue for every account you add, you can save queues as queue templates to reuse them. If you add another account for the same client, brand with a similar target audience, you can use the saved queue template to set up the queue for the new account.
Save Current Queue as Template
When you create and customize account schedule queues, they can be saved as a template. Once you have created the queue as per your preference, click on the Save as Template. Name the template appropriately and save.

How to Create a New Queue Template?
-
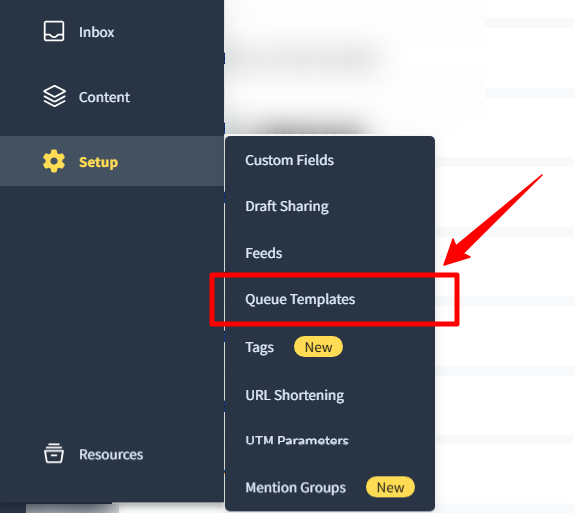
Navigate to the Setup menu >> Queue Templates.
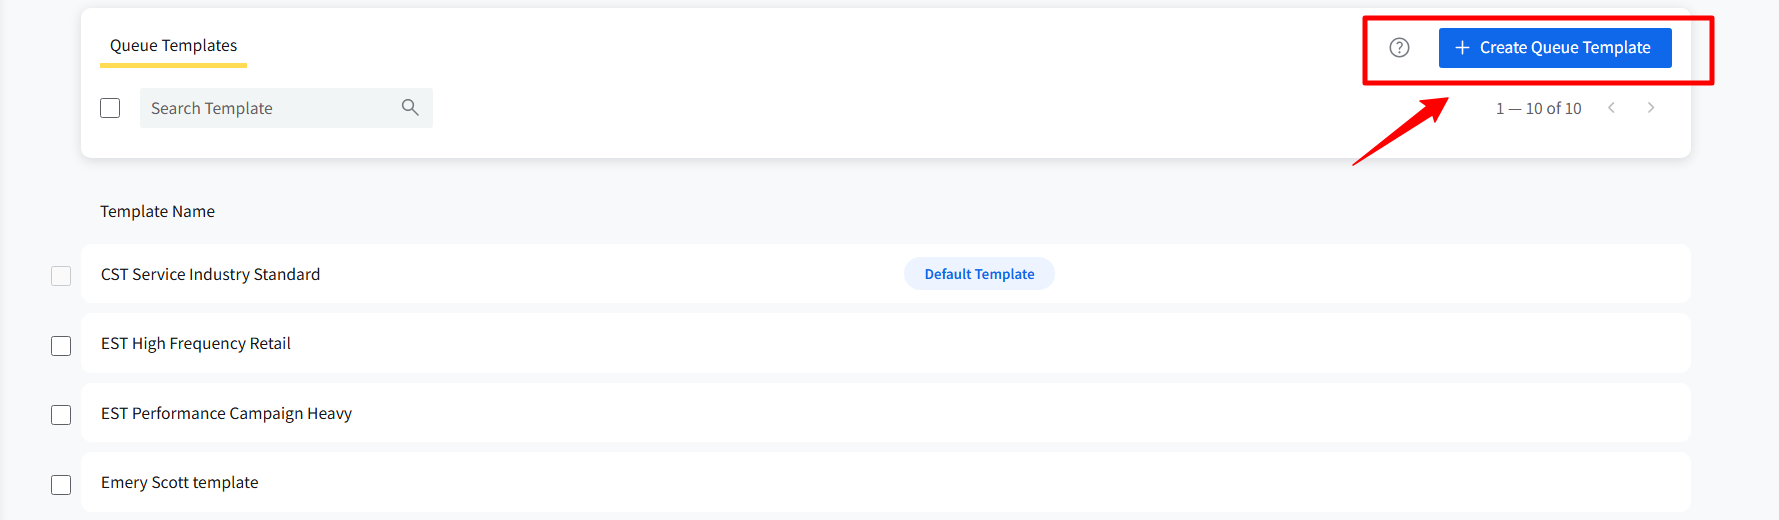
- On the Queue Templates page, you will find a default template and any other templates you might have saved. The default queue template cannot be deleted and is set as the default initially.
-
Click the Create Queue Template button.
-
Enter a template name and configure queue timings (schedule slots).
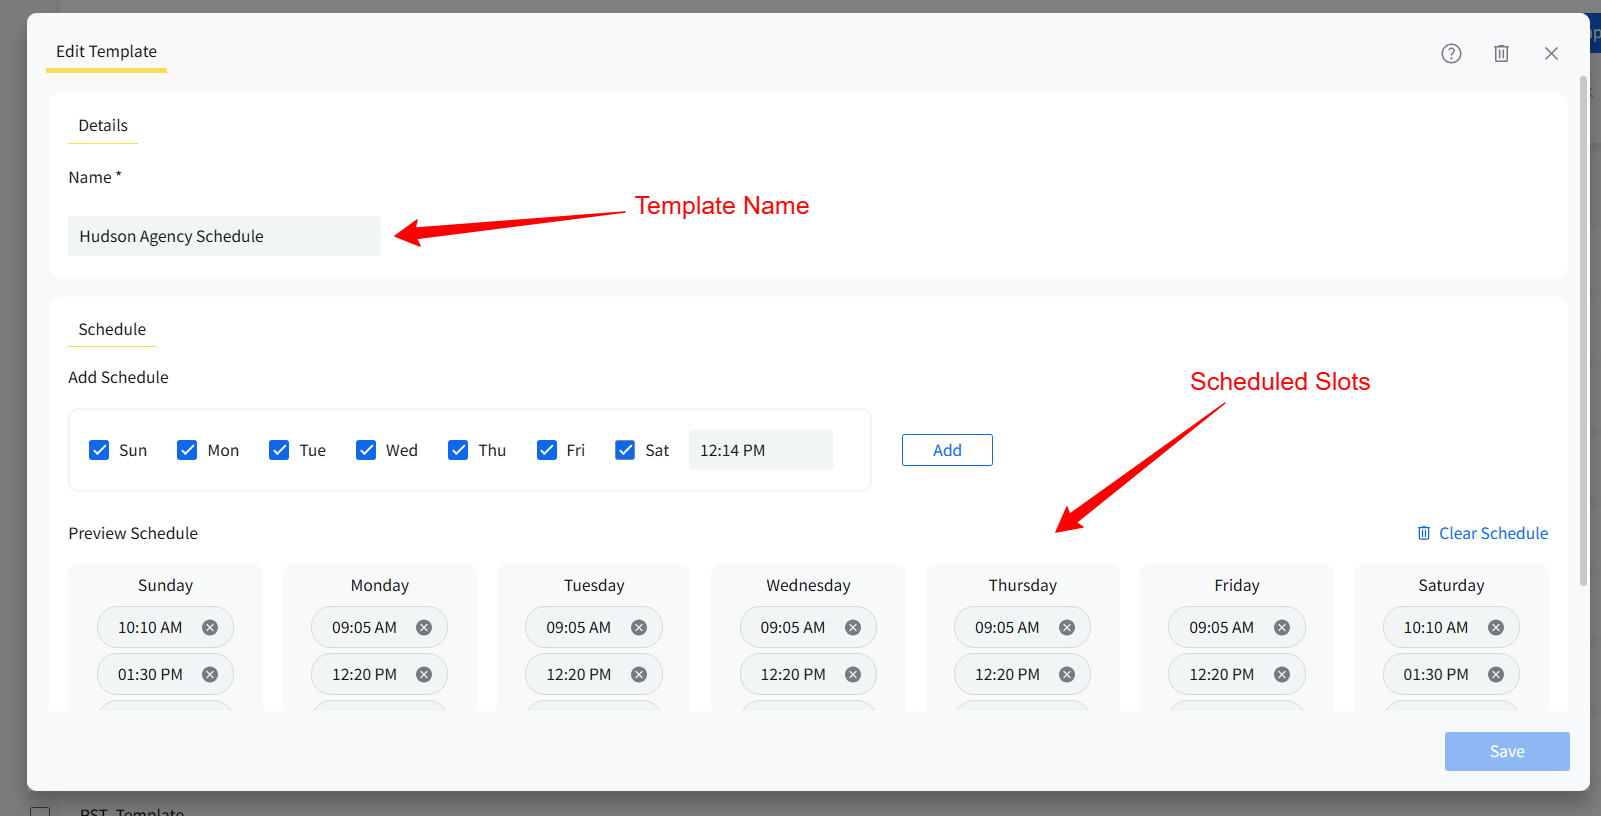
- Once done, click Save to save the new queue template.


You can edit, delete, and bulk delete the saved templates except for the default template.
How to Change the Default Template
-
Hover over any of the saved templates on the Queue Templates list.

-
Note that only the current default template will have a visible badge.

-
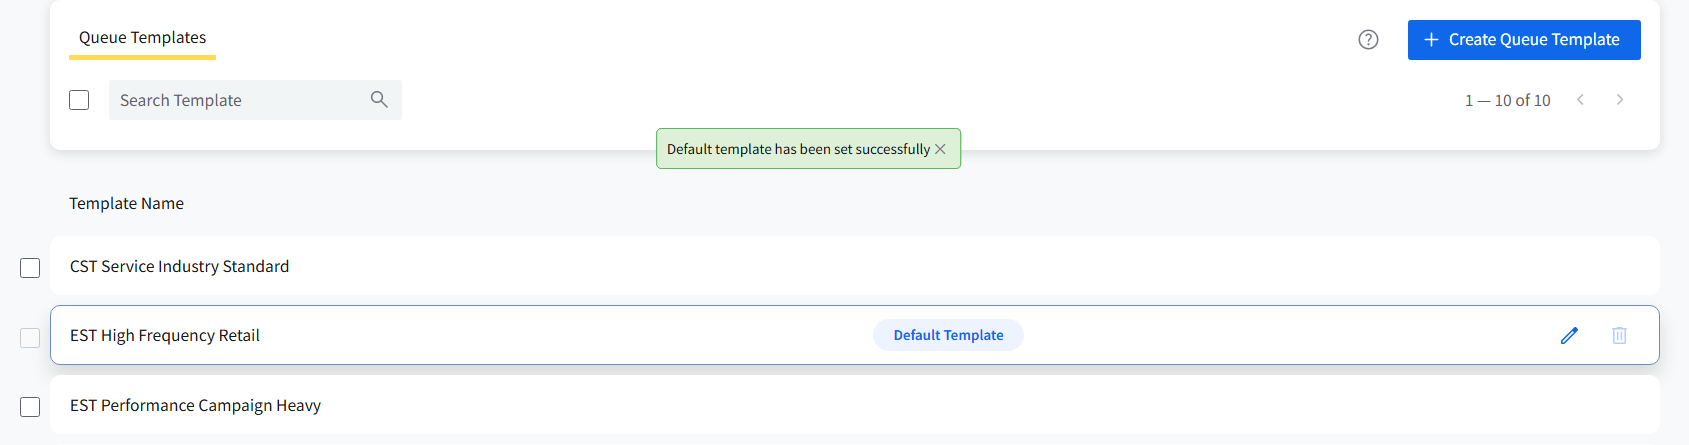
When you hover over any other normal template, a grey Default Template button will appear.

-
Click on that button to make this new template the default template.
- There can only be one default template at a time.


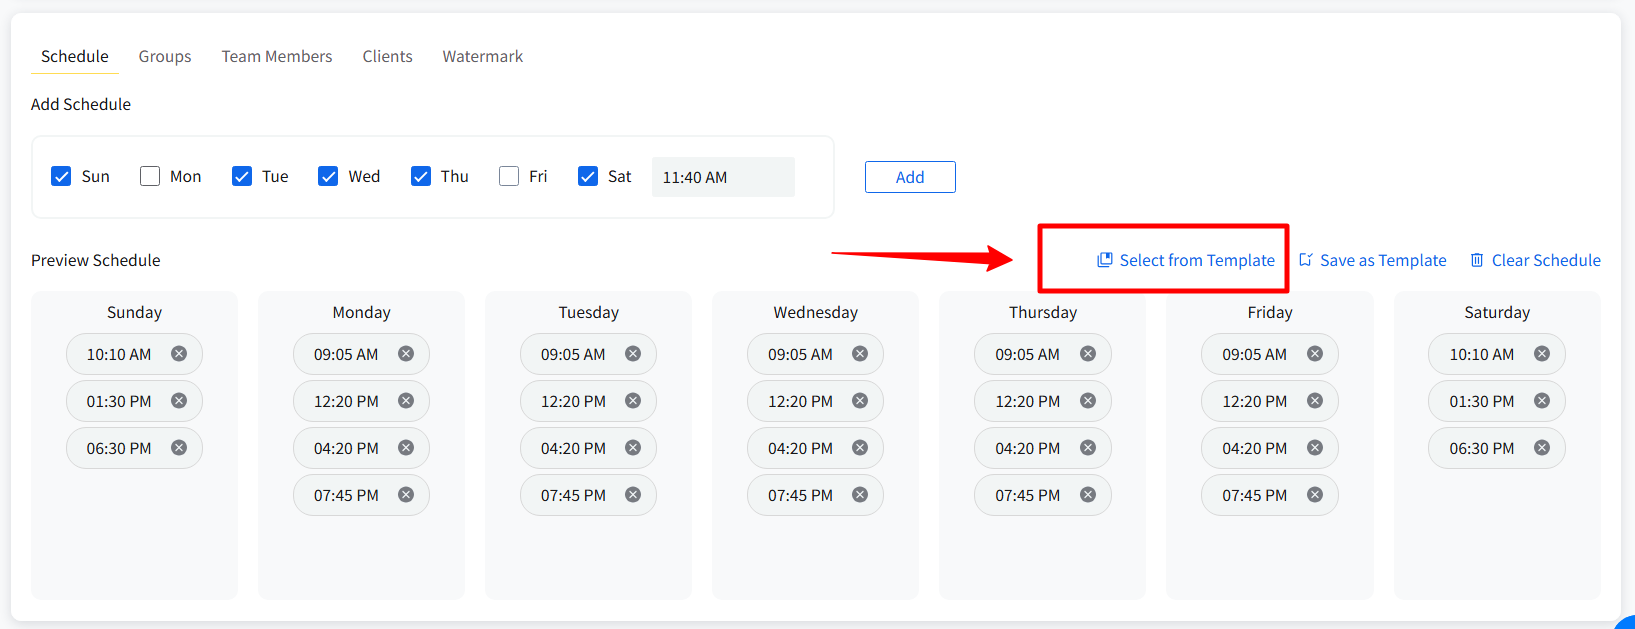
How to Apply a Queue Template to an Account?
-
When you connect a new account and go to set up the custom queue, click on Select from Template.
-
Select the relevant template from the pop-up list of saved templates.
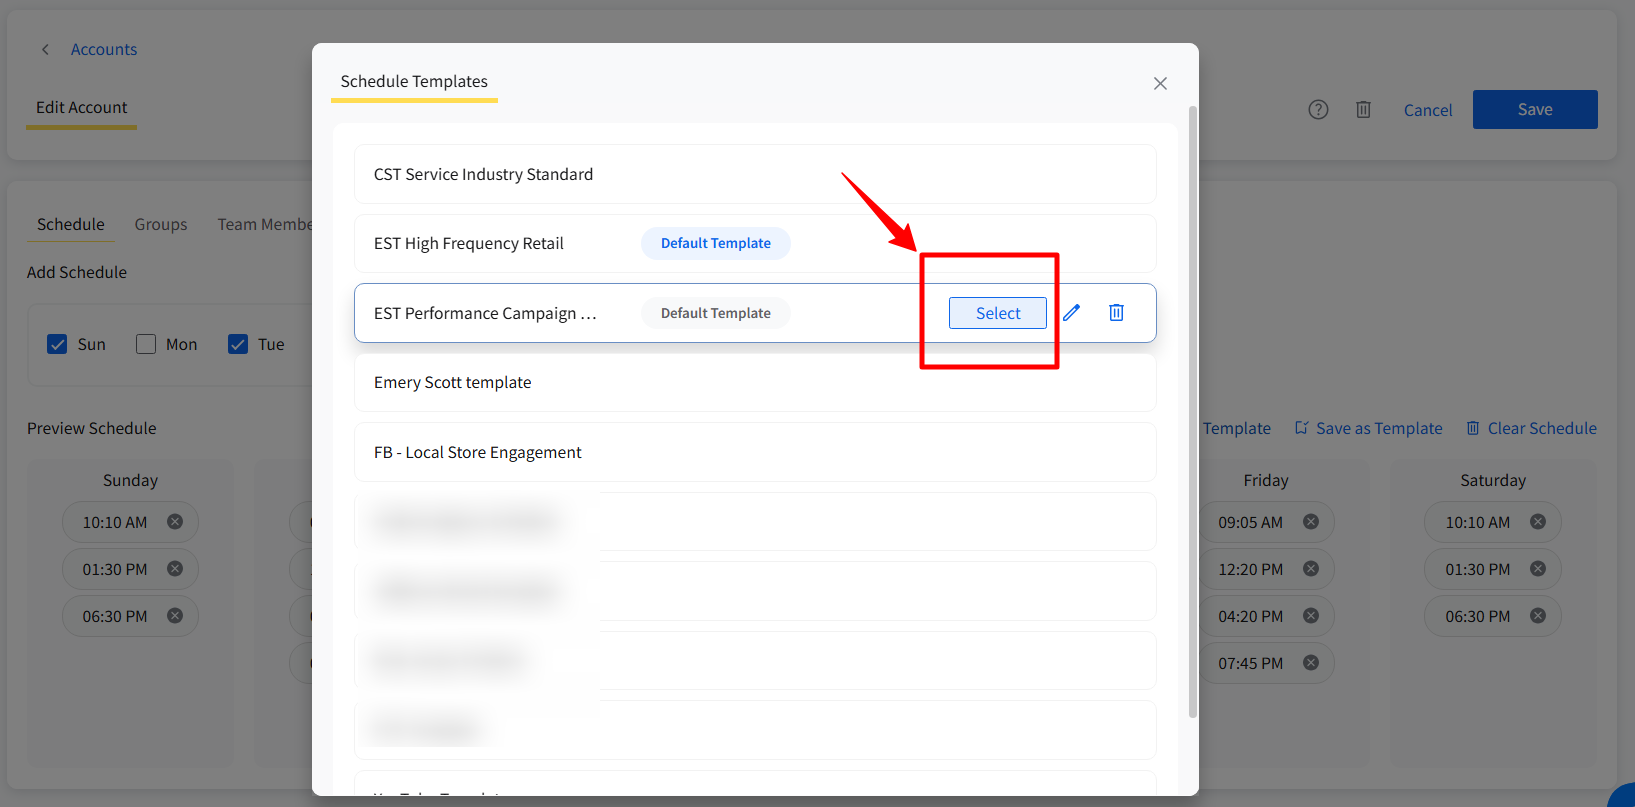
- Check to make sure the queue is in accordance with your required timings, making changes if required.
- Now, click on the Save button to seal the changes you have made.


How To Apply a Queue Template to Multiple Accounts?
You can apply the same queue template to multiple accounts simultaneously without manually editing each account and applying the schedule to it.

- Go to the sidebar and click on Accounts, then select Manage Accounts.
- The dashboard will show a list of all added accounts.
- From the left-hand side, select multiple accounts using the checkboxes.
- Once selected, an Add Schedule option will appear at the top of the list.
- Click on "Add Schedule" and select the queue template of your choice.

- The selected queue template will be applied to all chosen accounts.
How Does the Queue Template Work?
The role of the schedule queue set for each account comes into play when you are scheduling posts.

Add to Queue: If you select this scheduling option, your post will be automatically scheduled and published in the next available timeslot in the schedule queue of the selected account.
Share Next: When you opt for this scheduling option, your post will be scheduled for publishing in the upcoming timeslot in the schedule queue from the current time.
FAQs
1. Can I delete the default template?
A. No. The default queue template cannot be deleted or bulk-deleted.
2. Can I change the default template?
A. Yes. Hover over a template and click the Default button, which appears only when you hover over a non-default template. The new default is applied and protected from deletion.
3. Who can access and manage these templates?
A. All users except "Content Schedules" and "Clients" can access queue templates via Queue Templates page. All users with access to manage accounts can apply Queue Templates to accounts.
4. What happens when I connect a new account?
A. The default queue template is automatically applied once the account is successfully added.
5. Can I apply different templates to different accounts?
A. Yes, use the Select from Template option inside the Edit Account screen.