How to Edit and Export Location Reports?
Location Reports in SocialPilot Reviews help you analyze and visualize the performance of each of your brand’s locations individually. Whenever a new location is added, a ready-to-use report is automatically created and listed under Location Reports, pulling in live data from all connected review platforms. This makes it easy to track ratings, identify trends, and share performance insights with your team or clients, all from one place.
Here’s how you can create and customize Location Reports on SocialPilot Reviews:
In This Article
- How to Access Location Reports?
- How to Edit a Location Report?
- How to Customize Your Location Report?
- How to Edit and Manage Pages?
- Understanding the Report Header Bar
- How to Handle Errors and Reconnects?
- How to Reset Templates and Manage Auto-Updates?
- How to Export a Report as a PDF?
How to Access Location Reports?
To open and view Location Reports in SocialPilot Reviews:
- Go to your SocialPilot Reviews dashboard.
- From the sidebar, click Reports > Location Reports.
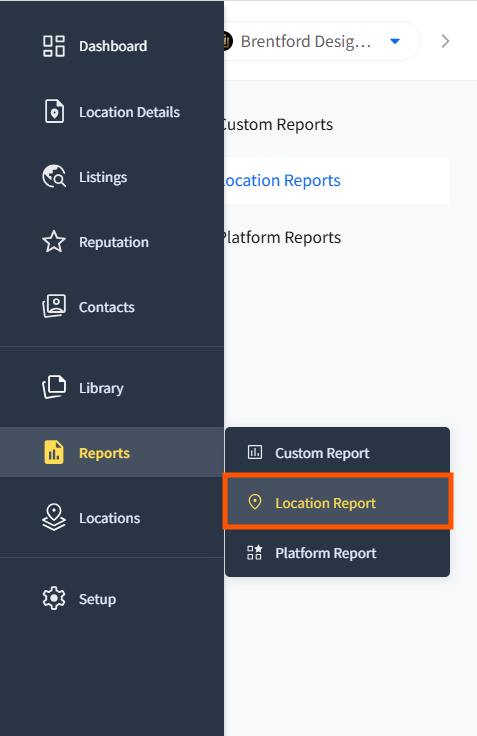
- You’ll see the Brand Dashboard, where all location-specific reports are listed.
- Select the desired brand from the dropdown menu to view its reports.
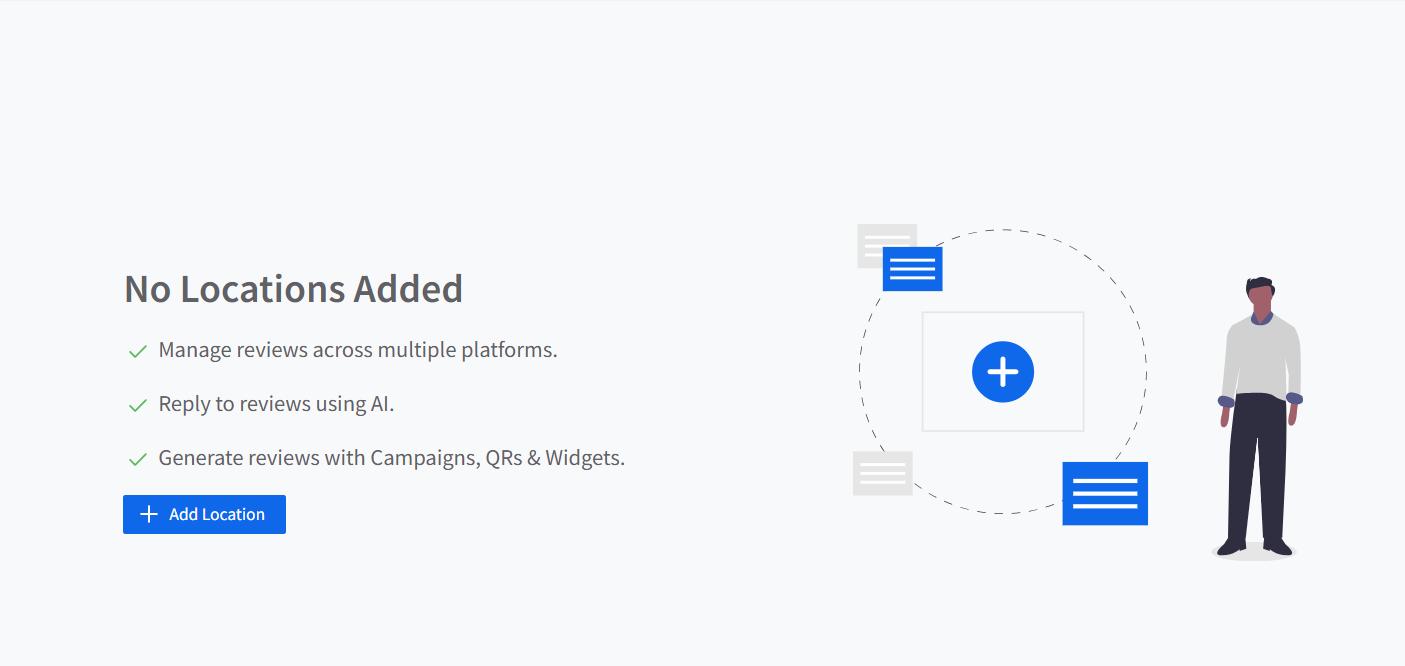
Whenever a new location is added under a brand, a report for it is automatically created and displayed here.
If no locations are added under a brand, you’ll see a default landing page encouraging you to add a location. Once a location is added, its report is created automatically, and live analytics begin to populate.
📋 Notes:
- Reports are visible to all users who have access to that specific location. If a user doesn’t have access, the report will appear locked.
- Location Reports are auto-generated and cannot be manually created or deleted.
How to Edit a Location Report?
- Click on the Location Report you want to edit and open it in View Mode, where live analytics for the last 30 days are displayed.
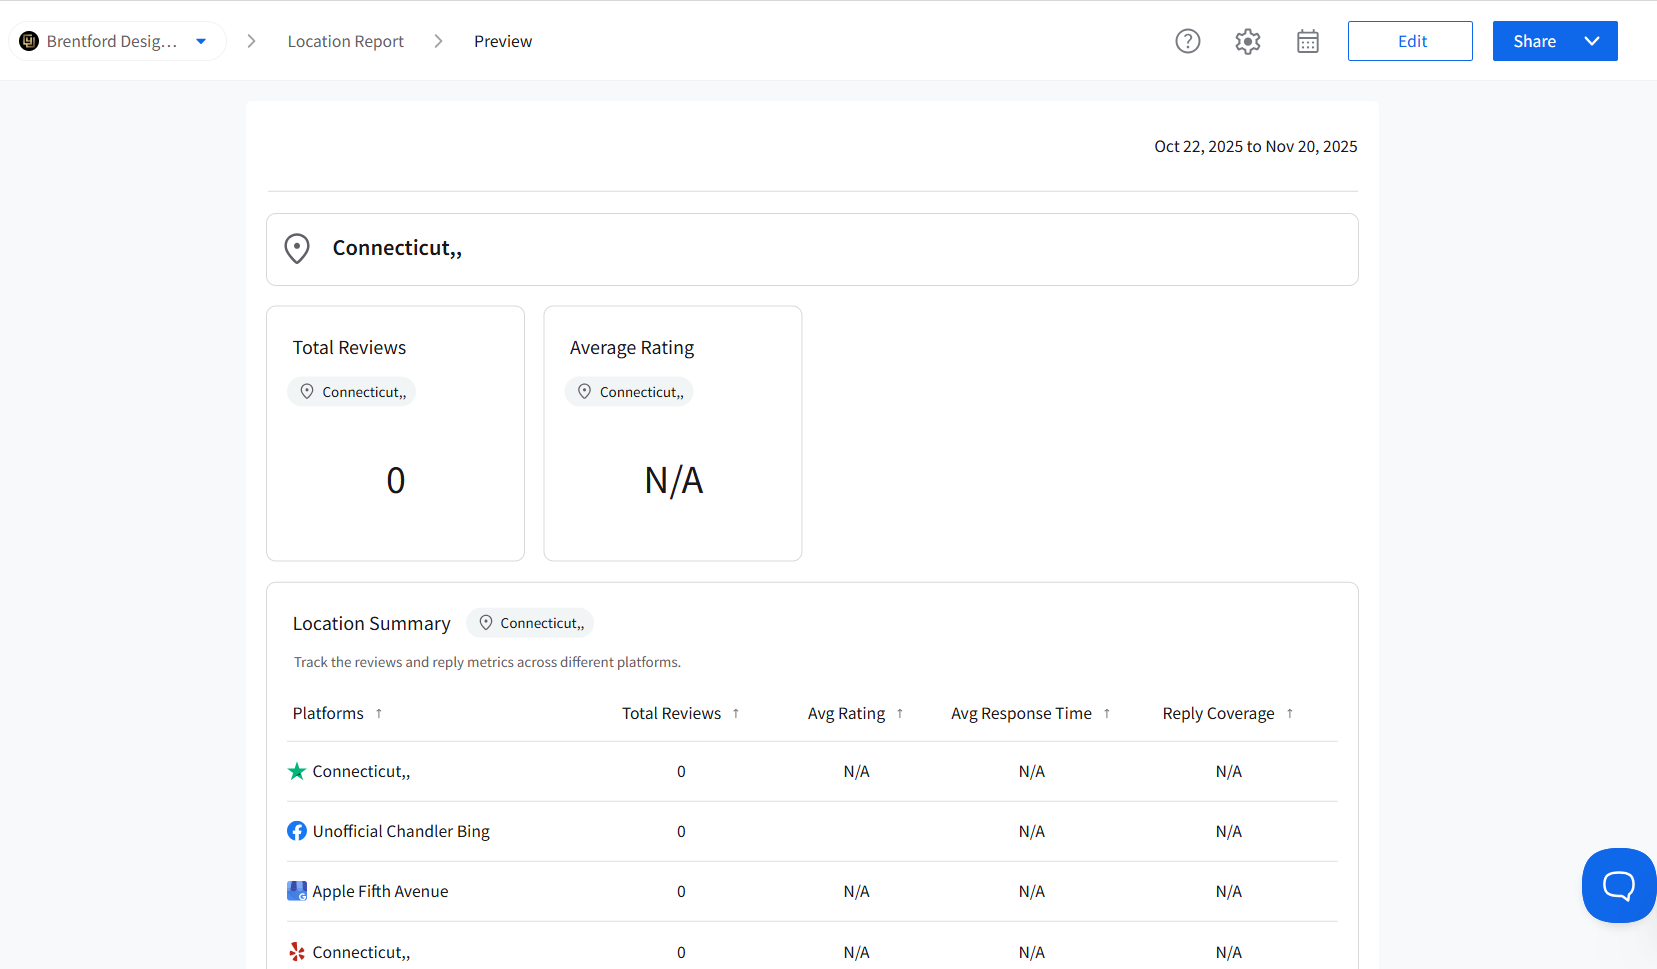
- You can then navigate through performance blocks, average ratings, and other location-specific metrics.
📋 Note:
You can also create your own custom report by clicking Create Report. This opens a pop-up where you can name your report and choose the locations you want to include.
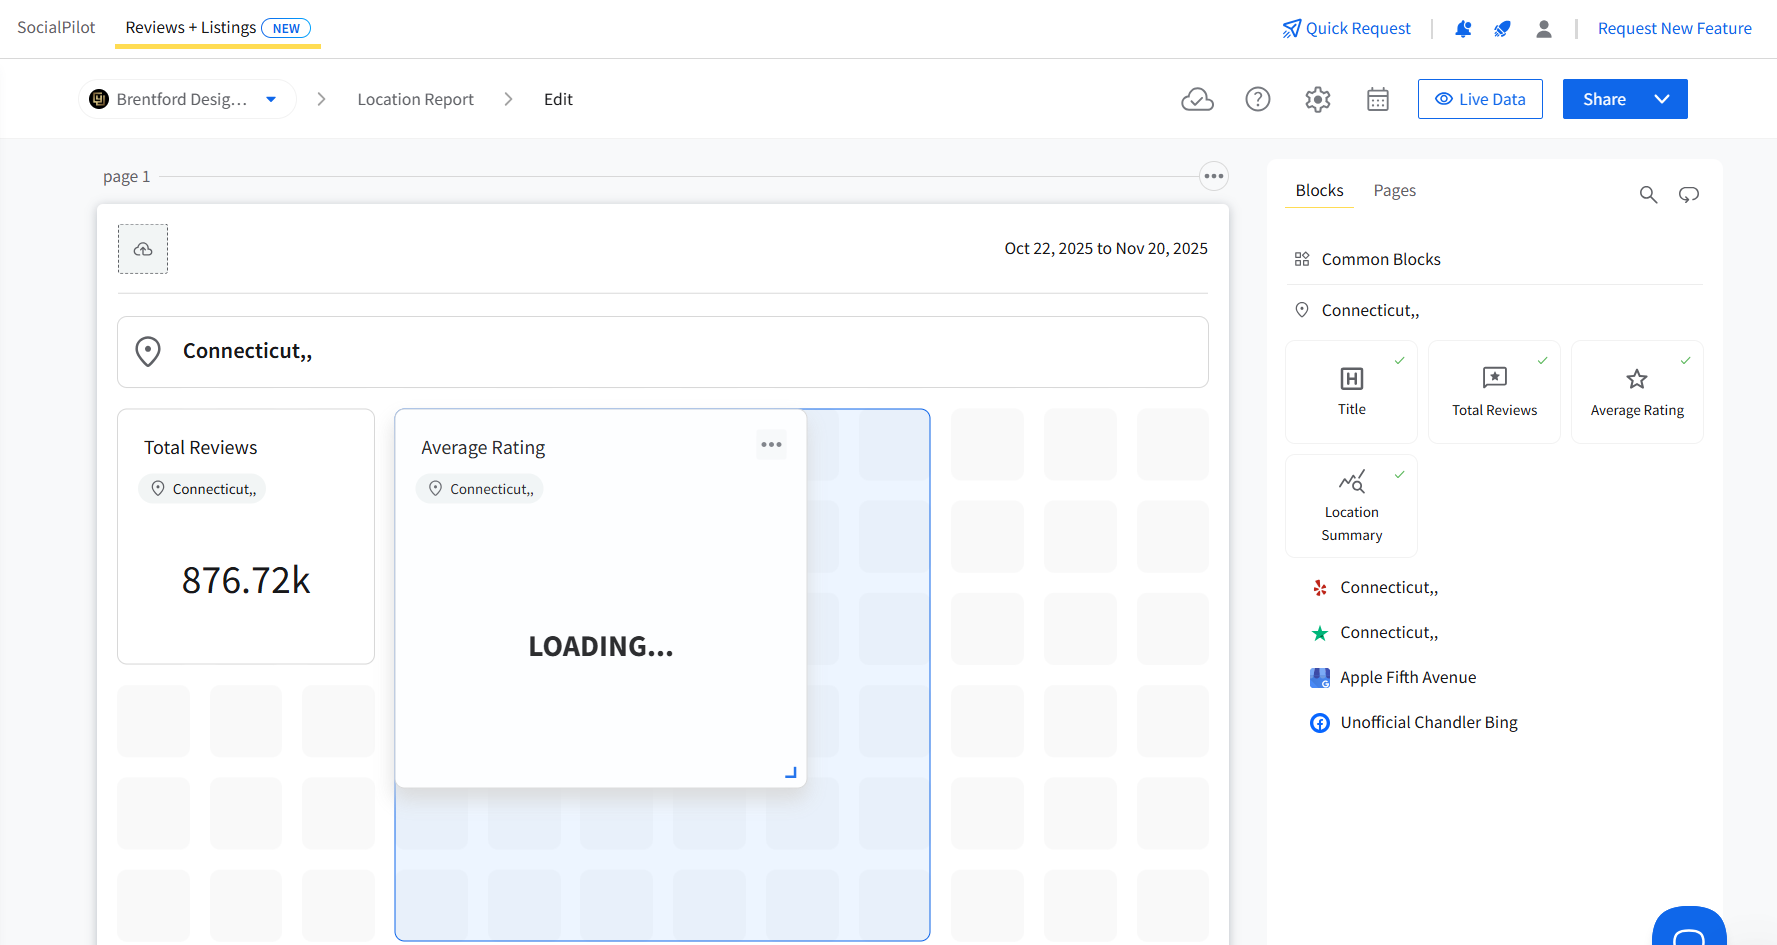
How to Customize Your Location Report?
Once you switch to the Edit Mode, you’ll see a right-hand sidebar with two key sections—Blocks and Pages.
In the Blocks tab:
- View all available Metric Blocks for connected platforms.
- Hover over any block to preview its Title, Description, and Image.
- Drag and drop the desired blocks into your report layout.
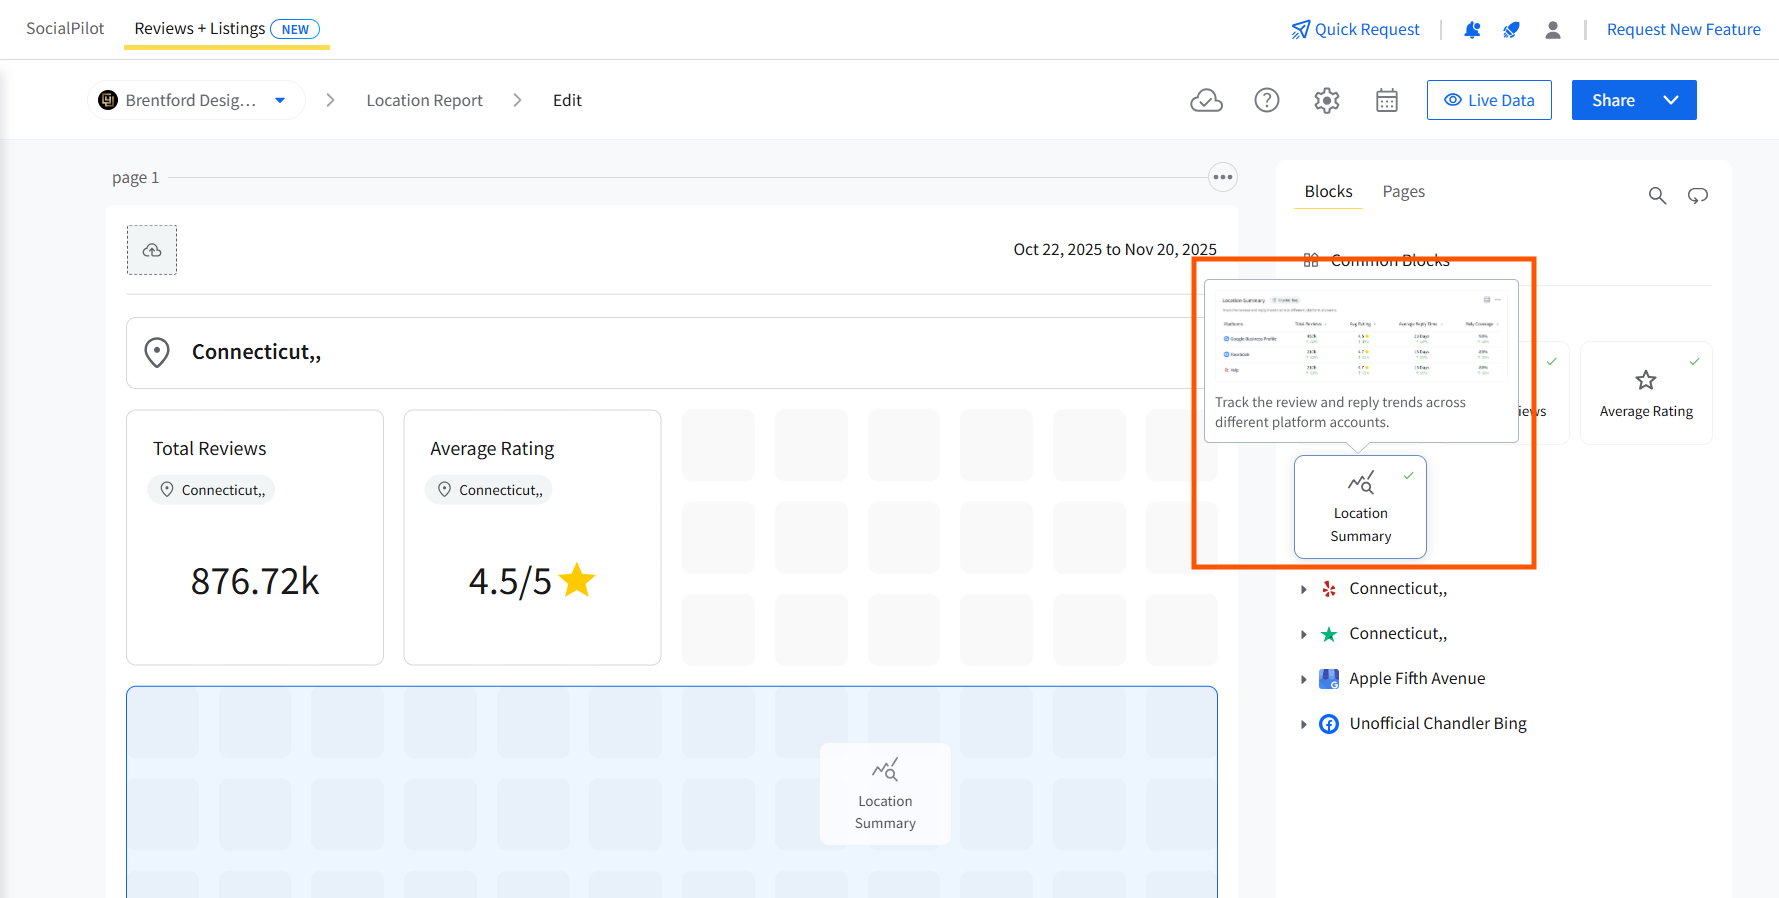
- Use the search bar to find blocks by name, platform, or location.
- Each added block shows a ✅ Green Tick to indicate it’s already in use.
- Adjust the block size with the Resize Handle or delete it using the three dots on top.
📋 Note: The Average Rating Trend block in Location Reports displays a shaded line graph of your average rating over time, grouped by Day, Week, or Month (default: Weekly).
- In edit mode, use the switcher in the top-right corner of the block to change the grouping.
- In view mode, a pill in the top-right corner shows the active grouping.
- Grouping follows calendar periods, not rolling windows.
- For Facebook, ratings are calculated as 1 (Recommended) or 0 (Not Recommended), then averaged.
- If your report is on the default system template, this block is added automatically. If you've customized your layout, drag it in manually from the sidebar, or click Reset to Default to restore the full default template.
How to Edit and Manage Pages?
- From the top-right corner, switch to the Pages Tab.
- Click Add Page to create a new one. New pages will automatically be named Page 1, Page 2, and so on.

- To rename, double-click the Page Name or use the Three Dots (⋮) option.
- To delete a page, select it and click the Delete Icon from the same menu.
- If the page contains any blocks, you’ll see a confirmation pop-up before deletion.
- Empty pages are removed instantly.
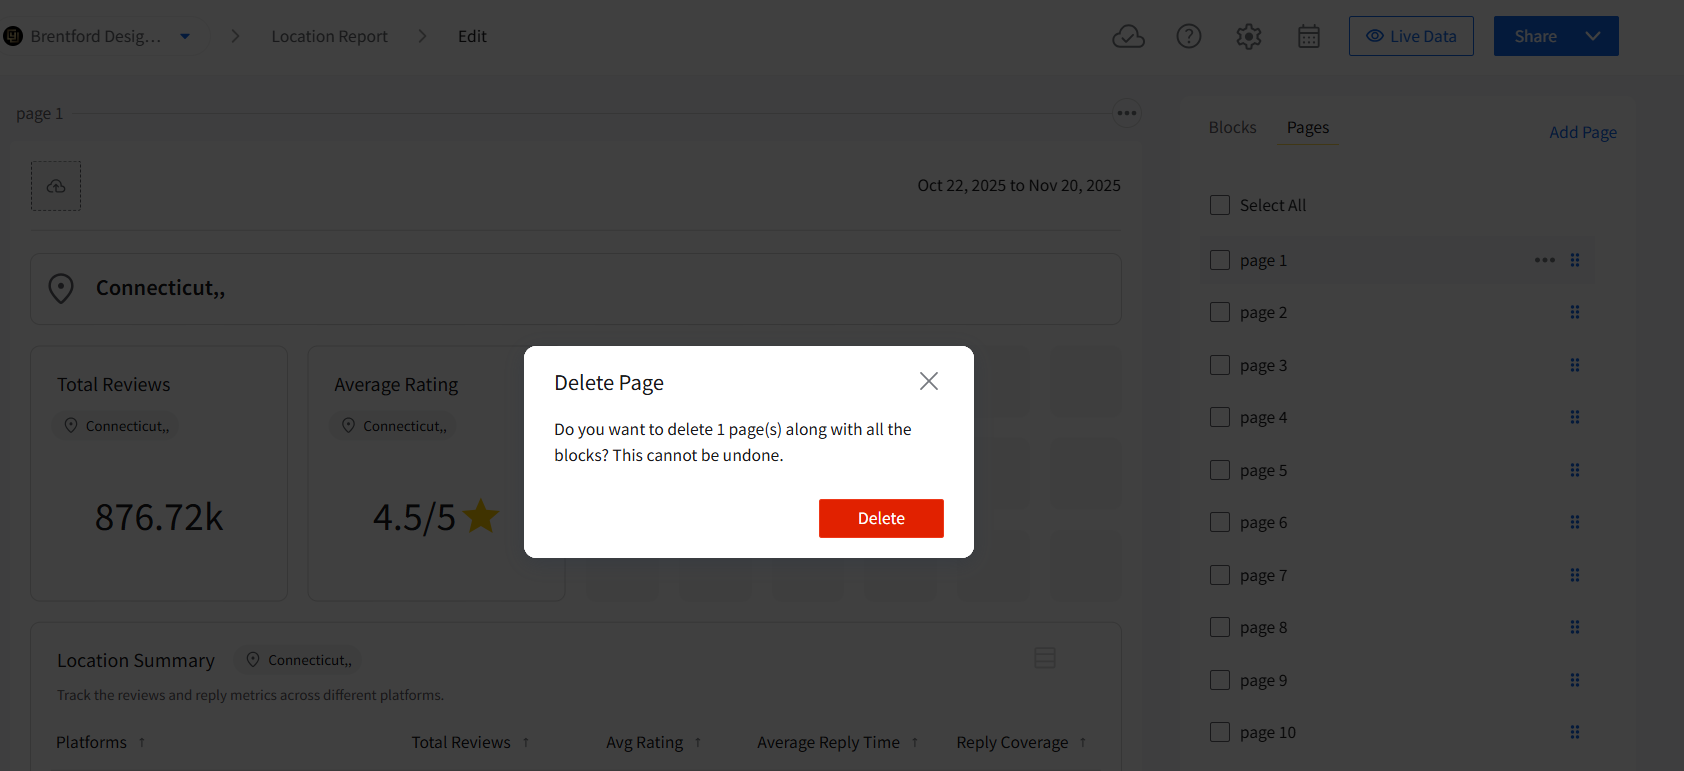
- If no pages exist and you add a block, Page 1 gets created automatically.
For any page, you can also manage visibility settings for the profile picture and address by clicking the three dots on the title block for that platform.
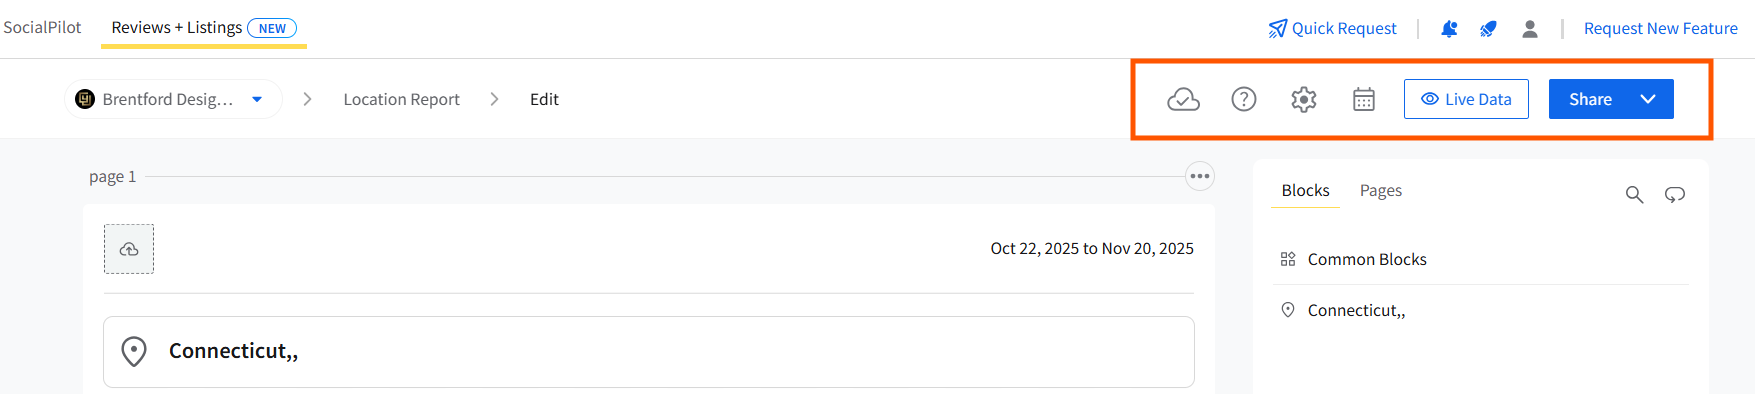
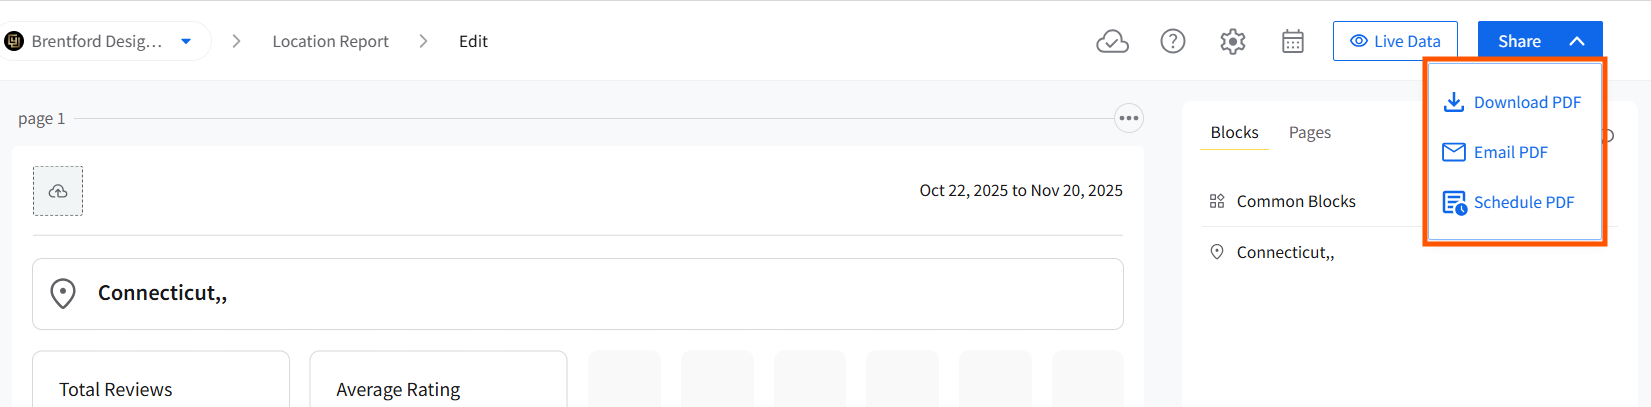
Understanding the Report Header Bar
The header bar at the top of your report acts as your main control center. It gives you quick access to all essential functions and ensures your reporting process stays organized and efficient.
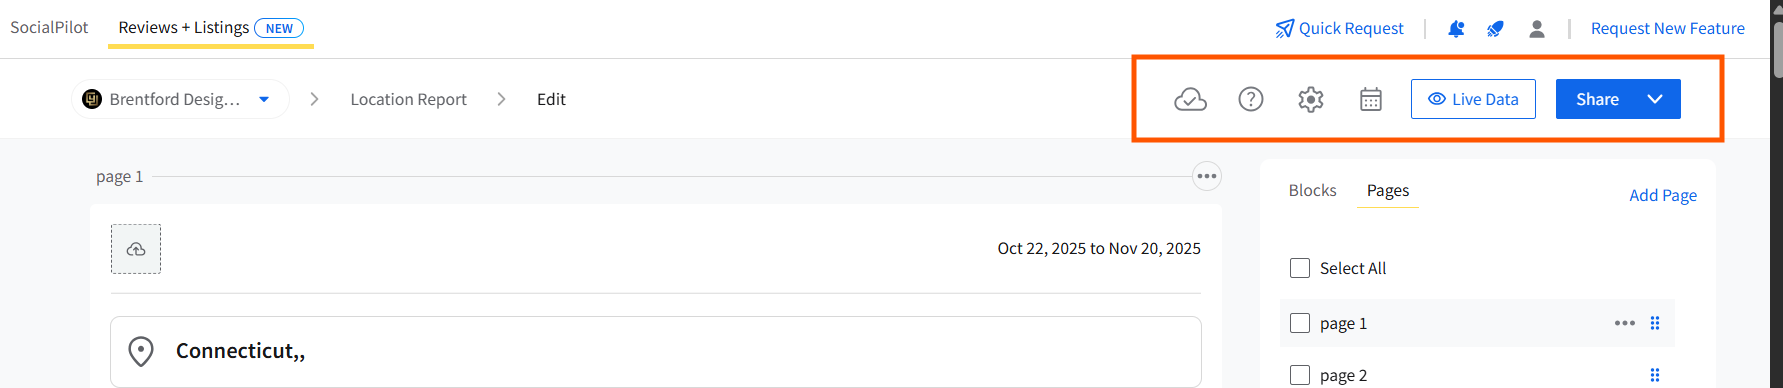
Here’s what you can do from the header bar:
Edit Report: Make changes to the selected report.
Share Options: Download reports as PDFs, email them, or schedule automated deliveries.
Report Settings: Update the report name, adjust scheduling preferences, or manage delivery setup.
Live Data Toggle: Switch on to view live metrics.
Auto-Save Indicator: Confirms that every change is automatically saved.
How to Handle Errors and Reconnects?
- The platform name will appear in red in the right sidebar.

- Click Reconnect to fix access issues.
- Error Cards on the canvas can be moved or deleted like other blocks.
Once the issue is resolved, the error cards disappear automatically.
📋 Note:
How to Reset Templates and Manage Auto-Updates?
Every Location Report stays synced with your connected platforms.
- If the report follows the system Default Template, new metrics and accounts are added automatically.
- When you make manual changes, Auto-Sync pauses to preserve your customizations.
- To resume auto-updates, click Reset to Default from the sidebar
📋 Note:
Resetting restores the system layout and re-enables auto-updates. All manual edits will be lost.
How to Export Platform Reports as PDF?
- When your report is ready, go to the Header Bar.
- Click the Share dropdown and select Download PDF.
- The exported PDF mirrors your editor layout—pages, blocks, and all design elements appear exactly as built.
📝Note:
Inaccessible or locked blocks are automatically excluded from the exported report.