How to Create and Schedule a Post on the New Create Post?
Introduction
The redesigned Create Post experience gives you a cleaner, faster, and more intuitive way to create and schedule posts across all your social media accounts. With a simplified layout, dedicated Media and Content spaces, auto-save, and smoother customization, you can now build high-quality posts with far fewer steps while still supporting text, links, images, videos, and GIFs.
In This Article
- How to Create a New Post?
- How Does the Add to Queue Option Work?
- How Does the Schedule Post Option Work?
- How to Stagger Posts on SocialPilot?
- How Does the Repeat Post Option Work?
How to Create a New Post?
Creating a new post on the new SocialPilot Create Post interface is now simpler, clearer, and designed for faster multi-platform publishing.
Follow these steps to get started:
- Before creating a post, ensure that your social media accounts are connected through the Connect Account page.
- Access the Post Creation Page. From the sidebar menu, click on Posts -> Create Post.
- Enter your caption in the Content Space. This area includes only caption-related tools, such as custom fields, mentions, emojis, and hashtags, keeping the writing experience focused and clutter-free.
You can bring in posts from your Library, apply tags, add UTMs, or shorten URLs when required.
Mentions added in your main caption carry forward, and you can mention multiple platforms at once. Mention Groups are saved and suggested for reuse.

- Click on the Add Media icon to open the Media Space. From here, you can:
✔️ Upload and manage images and videos.
✔️ Copy and paste media files directly into the editor.
✔️ View media uploaded in the last 7 days under Recently Uploaded.
✔️ Fetch images from a URL (image or website).
✔️ Add Alt Text to images.
✔️ Drag-and-drop an image onto an article link preview to convert the preview into a media post.
Media is now unified across all selected platforms. If you add an image, all selected platforms get an image. If you add a video, all platforms get a video.
📋 Pro Tips:
- If you enter a URL, you will see a preview of all images from that page. For Facebook, Twitter, and Tumblr, you can upload a maximum of 4 images per post. To replace an image from a link preview, hover over it, click the camera icon with a plus symbol, and upload your preferred image. This applies to LinkedIn text or link posts only. Other platforms follow the o.g. meta tag set on the URL.
- Recently Uploaded is a rolling 7-day list; files are available for quick reuse within that window.
- Everything you type, upload, or modify is saved in real-time, available only in Create Post, so you never lose your work.
Choosing a video or GIF:
You can add videos and GIFs directly from the Media section using the new, streamlined workflow. Open the Media section and click Upload a file or drag and drop your media. To add media from external sources, click the three-dot menu.
All media actions now appear in one place, and only the options relevant to generic media handling are shown.
SocialPilot supports the following video formats:
- .avi
- .mp4
- .mov
- .webm

📋 Note: The Video Title and Content Category fields are available for YouTube and Facebook posts, besides the file, and AI Pilot can be used here to generate or refine video titles.
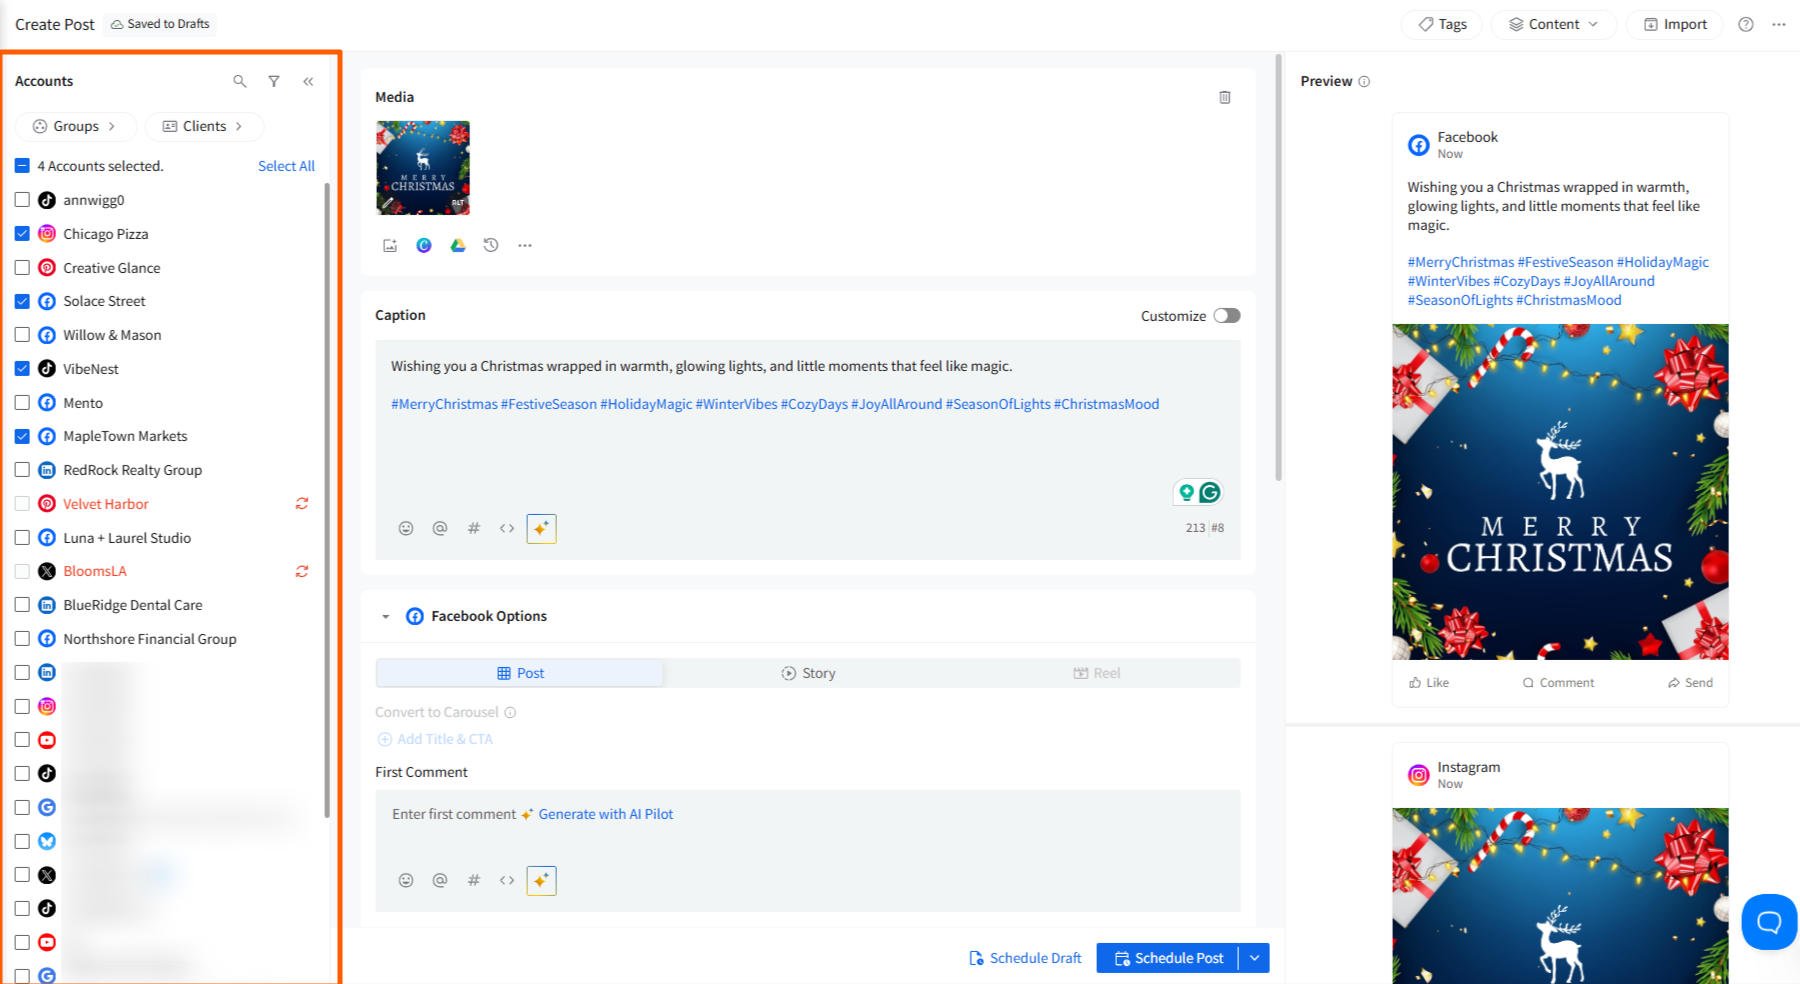
- Now choose account(s) from which you want to publish the post.
Accounts appear in a clean A–Z list, sortable by Clients and Groups in the left-side panel. You can collapse the Accounts panel for more workspace.
Selecting certain networks may disable other selections (e.g., Twitter/X allows posting to only one account).
Errors appear only when relevant to selected platforms. All errors are shown in a dedicated error list, so users can fix issues in one place. Error messages are contextual (e.g., character limit errors appear only when that platform is selected).

📋 Notes:
- Dismissed warnings are saved in the browser, so they don’t reappear unnecessarily.
- CTAs (Add to Queue, Schedule, Share Now) stay disabled until errors are resolved.
Platform-specific customization:
All platform-specific settings now appear in one smooth scroll; no more switching between tabs.
If you choose to customize content per platform, you can turn Customize for Each Platform ON.
✔️ When it’s ON, you can adjust captions individually for each selected platform.
✔️ When turning it OFF, all platform-specific edits will be replaced by the main caption. A confirmation will appear before this happens.
✔️ Only the relevant platform customization options appear based on the accounts selected.
Post previews load in the right-side panel only when needed and update automatically as you edit the content or media.

Choose a publishing option:
You can choose from the following scheduling actions:
Add to Queue: Schedule the post into your predefined time slots.
Share Now: Immediately publish your post.
Share Next: Publish your post in the next available time slot.
Schedule Post: Select a specific date and time or choose AI-suggested times.
Repeat Post: Publish the same post repeatedly across selected accounts over a set period or with AI-suggested times.
All your work gets auto-saved while you create your post, so no work is lost.
How Does the Add to Queue Option Work?
The Add to Queue option schedules your post into the predefined time slots you set for each account.

- Manage Time Slots:
Set multiple time slots per day for each account in the Manage Accounts section.
- Automatic Publishing:
When added to the queue, your post is assigned to the next available time slot.
For example, if you have 14 posts in the queue, the first post will publish on Friday at 1:00 p.m., the second at 10:00 p.m., and the third on Saturday at 3:30 p.m.

How Does the Schedule Post Option Work?
Schedule Post lets you choose exactly when your content goes live. You can do this manually or by using AI-suggested times.

Choose a Date and Time:
Click Schedule Post and select the date and time from the pop-up.
Use AI Suggestions:
You can also pick from recommended times based on your accounts’ engagement patterns.
Schedule Multiple Times:
You can set multiple times for the same post across platforms.
Avoid Simultaneous Posting:
Use Stagger Posting to space out when the post publishes across your accounts (15 minutes to 24 hours apart).

📋 Note: If something needs attention, like missing media, unsupported content, or a platform requirement, an error message will guide you before scheduling.
How to Stagger Posts on SocialPilot?
1. Once your post is ready, click on the Schedule Post option. A pop-up window will appear, allowing you to set a specific date and time for your post.
2. In the pop-up window, look for the Stagger Post toggle switch. It is typically set to OFF by default.
3. Switch the toggle to ON to activate the feature.

4. After activating the Stagger Post toggle, a dropdown list will appear, allowing you to select a time stagger interval between posts. You can choose intervals ranging from 15 minutes to 24 hours.
5. Choose your preferred interval based on how much time you want between each post being published on different accounts.
6. Once you have selected the time interval, SocialPilot will automatically calculate and display the staggered publishing times for each account. The order in which the posts will be published across the accounts is typically chosen alphabetically.
7. Review the staggered schedule to ensure it meets your needs. If everything looks good, click the Schedule button to finalize the process.
8. Your post will now be published across the selected accounts at the specified intervals, reducing the likelihood of repetitive content appearing simultaneously on all accounts.
Example:
If you schedule for 5 accounts with a 30-minute stagger starting at 10 AM:
- 10:00 AM
- 10:30 AM
- 11:00 AM
…and so on.
How Does the Repeat Post Option Work?
Repeating posts helps keep important content visible over time.
Here is a step-by-step guide to help you schedule repeat posts.
- Once you have created the post, go to the scheduling options and select Repeat Post from the Add to Queue dropdown.

-
A pop-up will prompt you to choose how many times the post should be repeated and over how many days.
Custom: Select this option to set a specific number of days between each post.
Daily: Choose this to repeat your post every day. You can select this frequency for up to 31 days.
Weekly: Select this option to repeat your post every week. You can set this frequency for up to 1 year.
Monthly: Use this to have posts repeated once a month. This frequency can be set for up to 2 years.

- Preview your repeat schedule and adjust as needed. You can also stagger these posts across accounts or use AI-suggested times.

- Once you are satisfied with the schedule, click Schedule to set up the repeated posts across your selected accounts.
📋 Note:
Users can choose up to 10 accounts for scheduling recurring posts. If you exceed this limit, the option in the dropdown will be disabled.
Related Articles:
-
Can I Save Posts as Drafts on SocialPilot in the New Create Post Experience?
-
Using the Accounts, Groups & Clients Panel in the New Create Post
-
How to Tag People/Pages While Creating Posts in the New Create Post?
-
How to Use the First Comment Feature in the New Create Post?
-
How to Use Platform Options in the New Create Post Experience?