How To Add Tags to My Content in the New Create Post?
Tags are customizable, descriptive labels that can be applied to social media posts at different stages of the content creation, publishing, and analysis process. They help you categorize, sort, and manage your content efficiently, while also enabling you to track the performance of specific campaigns or themes in Analytics. By using Tags, you can group posts by themes, campaigns, content types, or any other criteria that align with your social media strategy.
This guide explains where Tags appear in the new interface and how to use them effectively.
In This Article
- Who Can Access Tags?
- How To Access Tags?
- How To Create Tags?
- How To Add Tags While Creating a Post?
- How To Manage Tags?
- How To Filter Posts With Tags
- How To Use Tags in Analytics?
Who Can Access Tags?
All team members, including the owner, admin, manager, and content scheduler, can create and use Tags. Tags are accessible across posts, drafts, libraries, the inbox, Manage Posts, and Analytics, enabling every team member to collaborate seamlessly, organize content, and track campaign performance from creation to reporting within SocialPilot.
How To Access Tags?
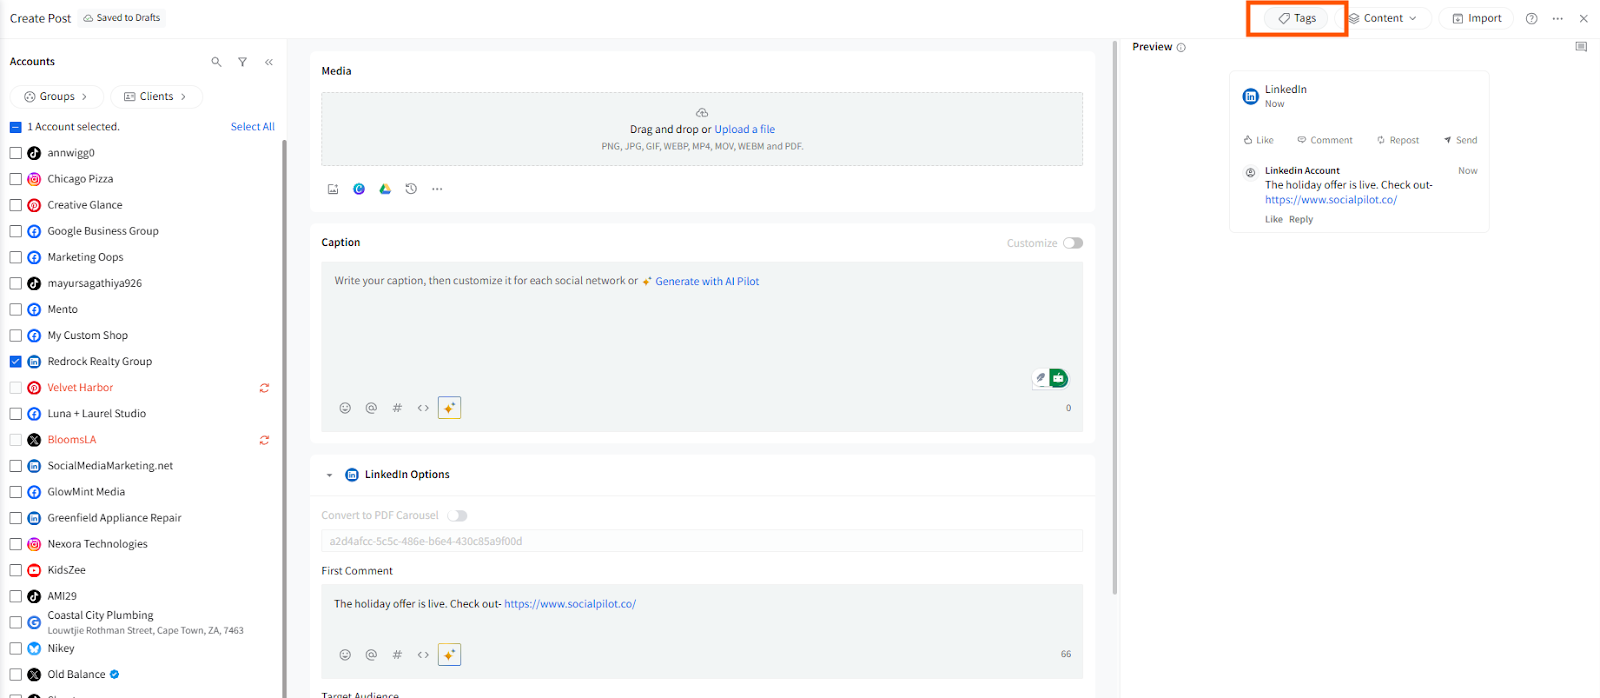
In the redesigned Create Post experience, Tags are placed in the Top Bar of the post composer. This keeps tagging separate from media, captions, and platform options.
This placement keeps Tags visible and accessible throughout the entire post-creation process. In the new Create Post dashboard—
- Tags are not tied to any specific platform and do not appear inside individual network tabs.
- Tags remain unchanged by caption customization, platform options, or media selection, ensuring consistency throughout the workflow.
- Tags apply at the post level, meaning one set of tags is used for all selected platforms.
- Tags are automatically saved and remain attached to the post as long as the draft exists.
How To Create Tags?
Creating and managing Tags in SocialPilot is a straightforward process. Let us show you the two ways to do so.
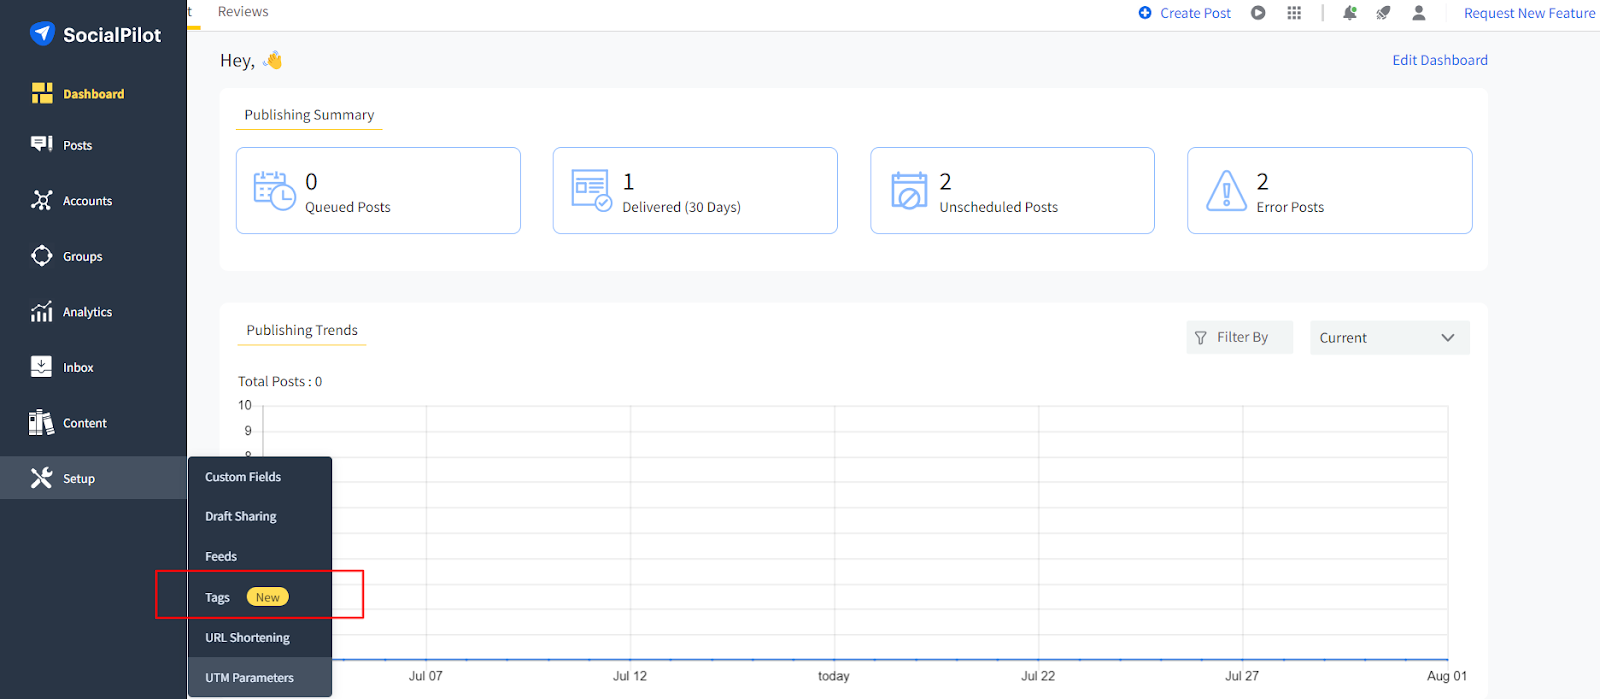
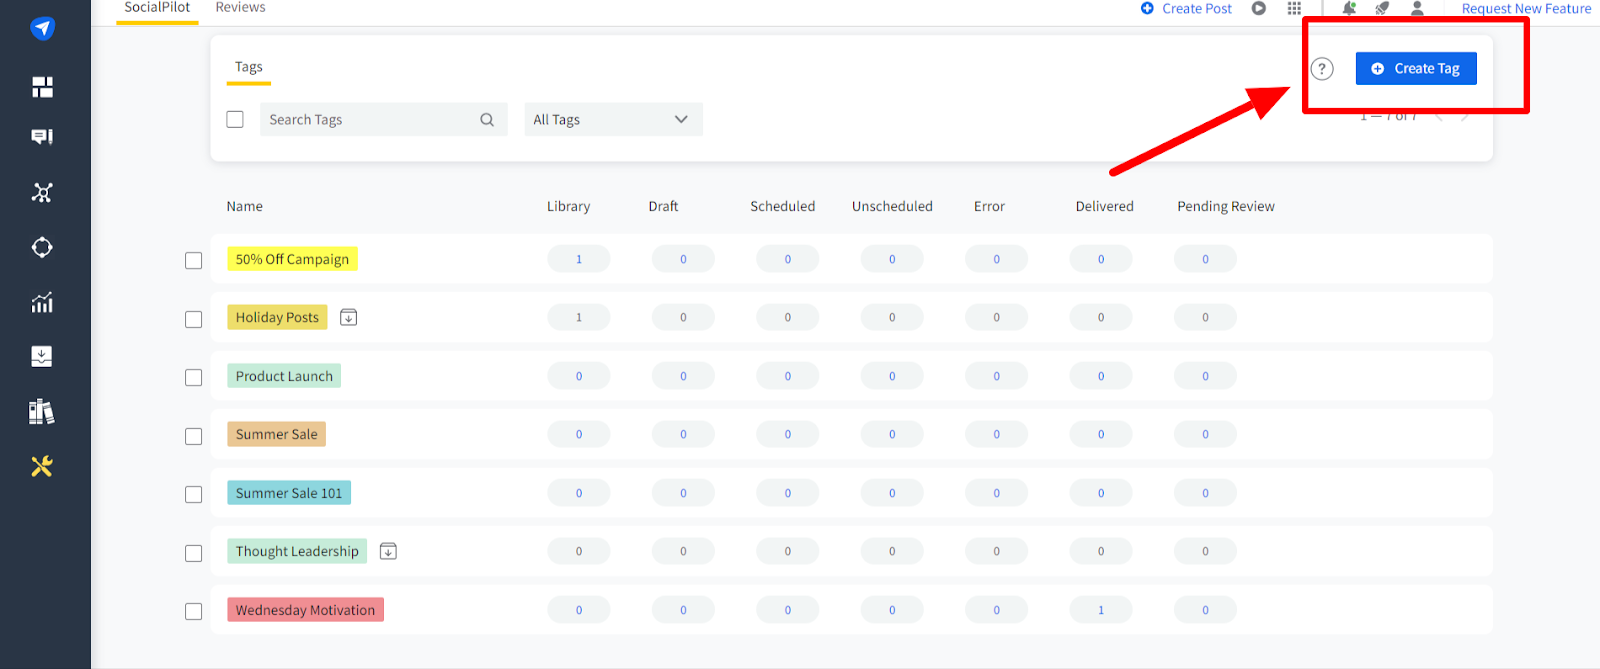
To create tags from Setup:
- Go to the Setup section in the left-hand sidebar and click on Tags.
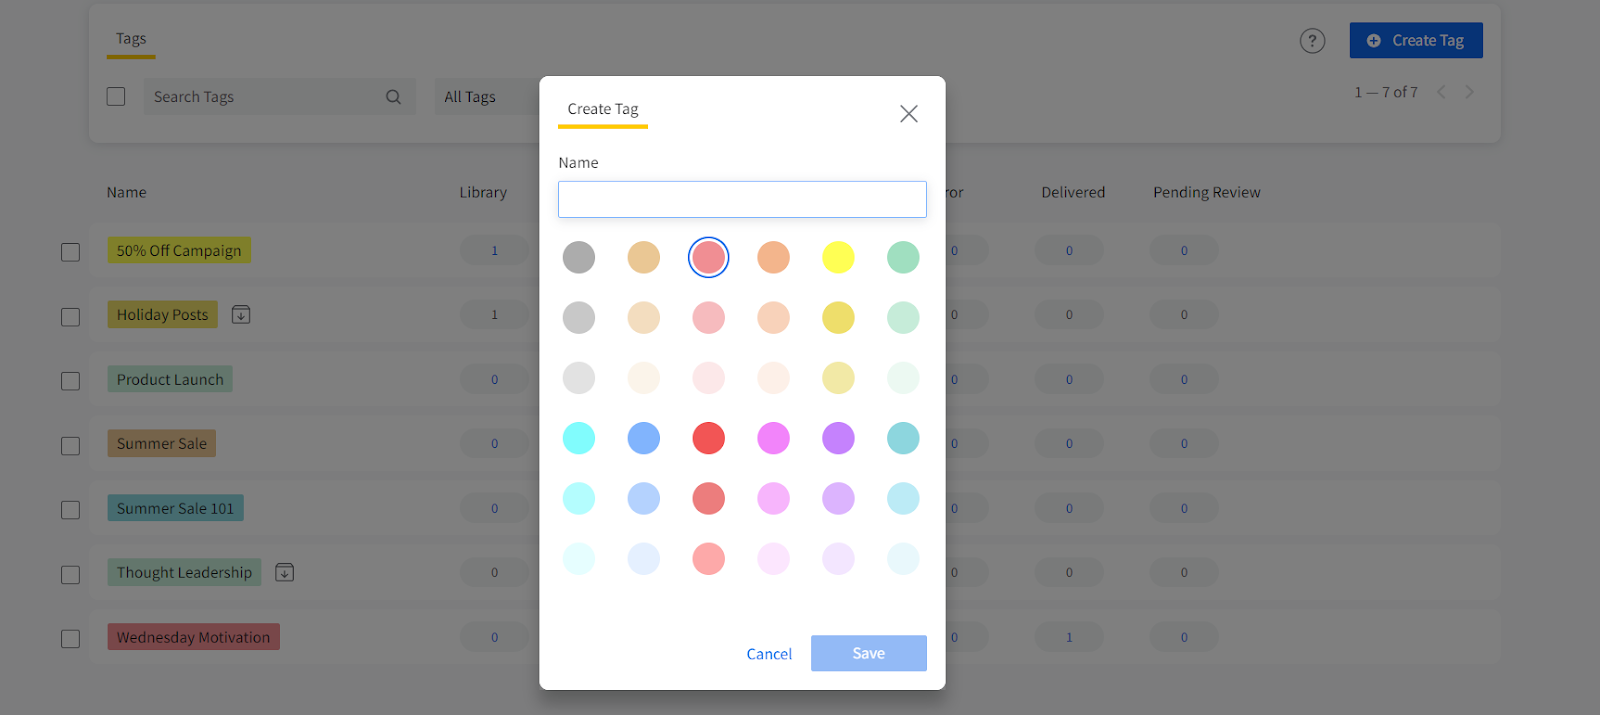
- Click on the Create Tag button to begin.
- A dialog box will appear where you can enter the name of your new Tag. Choose a descriptive name that represents the category or theme you want to apply.
- Next, select a color from the color picker. The color will visually differentiate the tag when managing posts. Selecting distinct colors for different Tags enhances usability, especially when organizing posts in the content calendar.
To create a tag directly from the New Create Post:
- Click the Tag icon in the Top Bar.
- Write the name of the new Tag you want to add.
- You will see a + Create option to create the Tag.
Click on Save.
The tag becomes immediately available for your current post and all future posts.
How To Add Tags While Creating a Post
You can apply Tags in several areas to organize content on SocialPilot.
Create Post Modal:
- Open Create Post.
- Click on Tags in the Top Bar.
- A panel will open where you can:
- Select one or multiple existing Tags
- Create a new Tag
- Remove applied tags
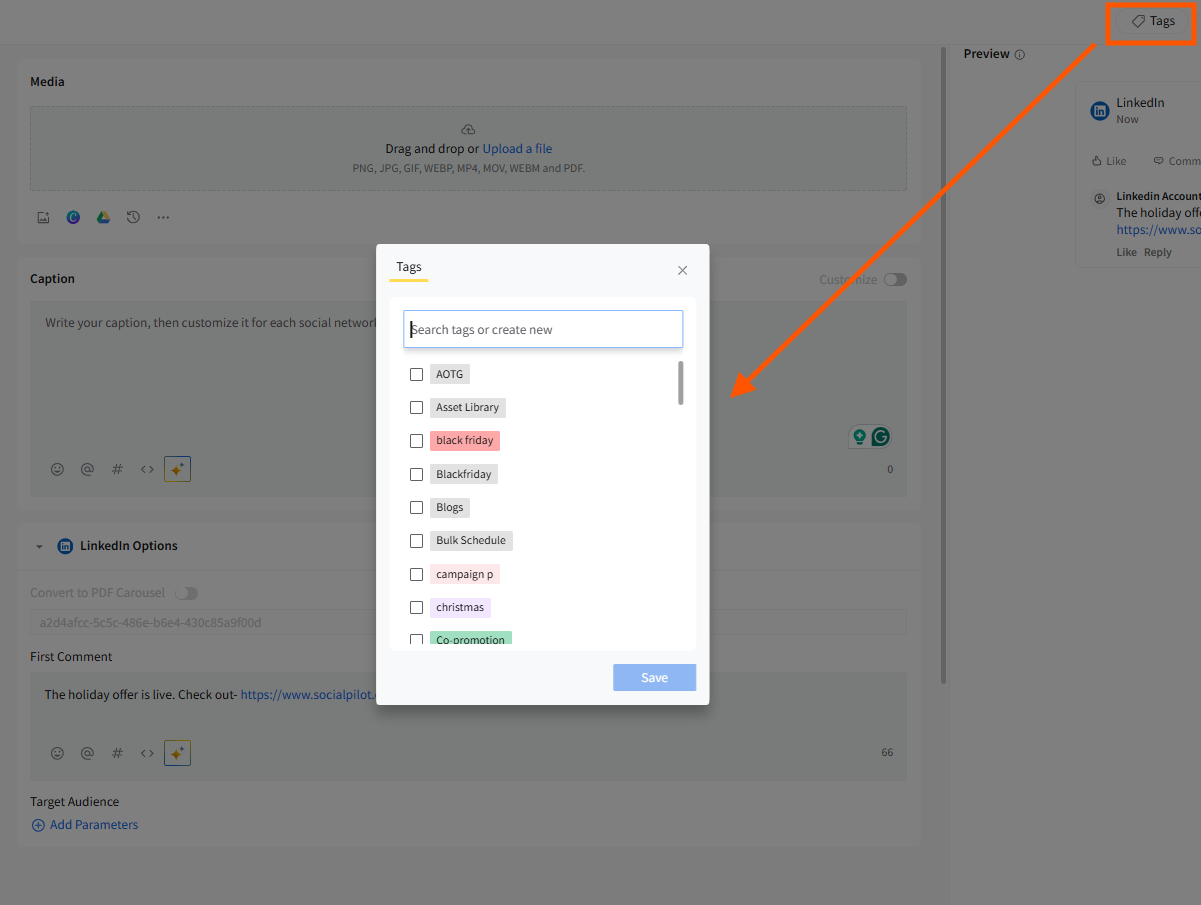
- The tags you select will be applied to the entire post.
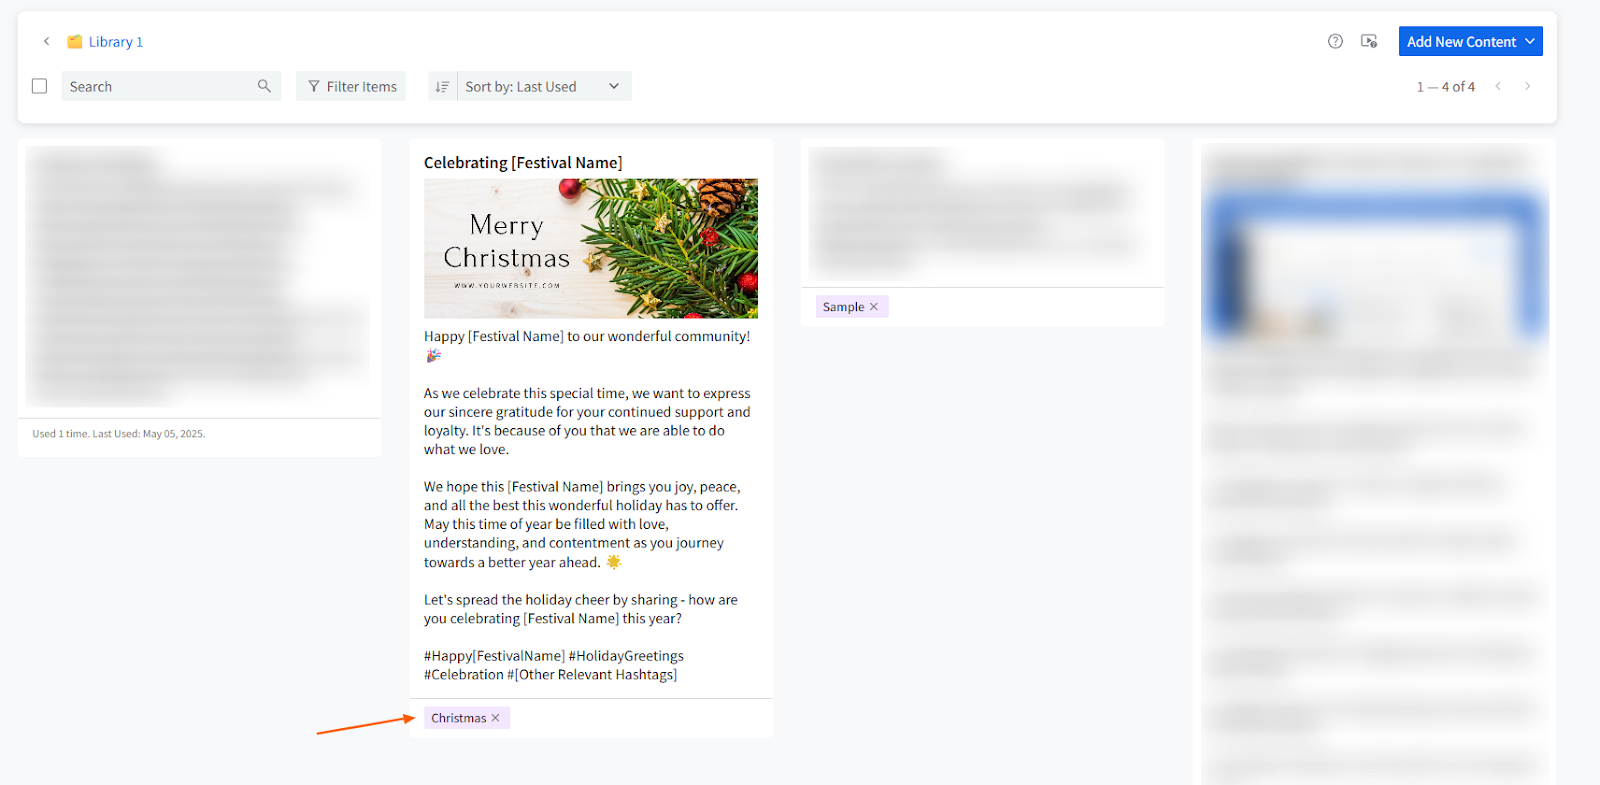
Content Library:
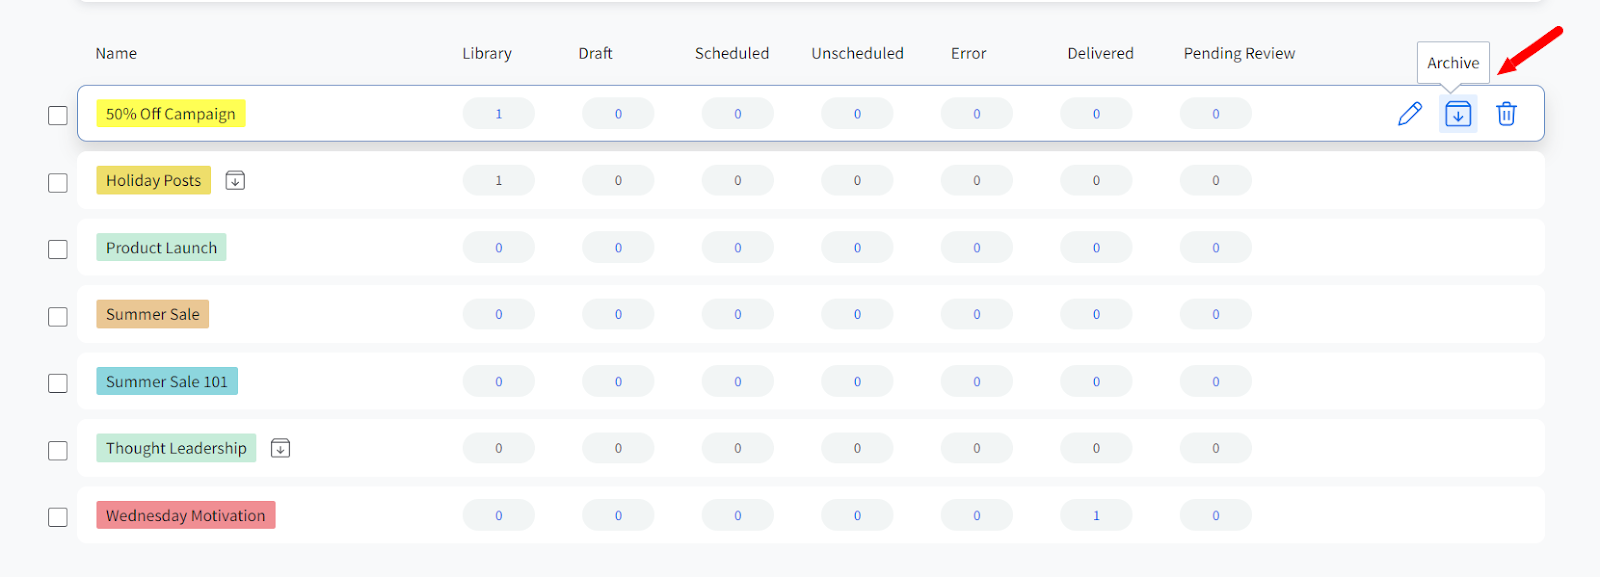
You can apply tags to each separate library as well as the content assets stored in them. Using tags to classify content and libraries streamlines the content organization in SocialPilot so the users can find what they are looking for, resulting in swift post creation.
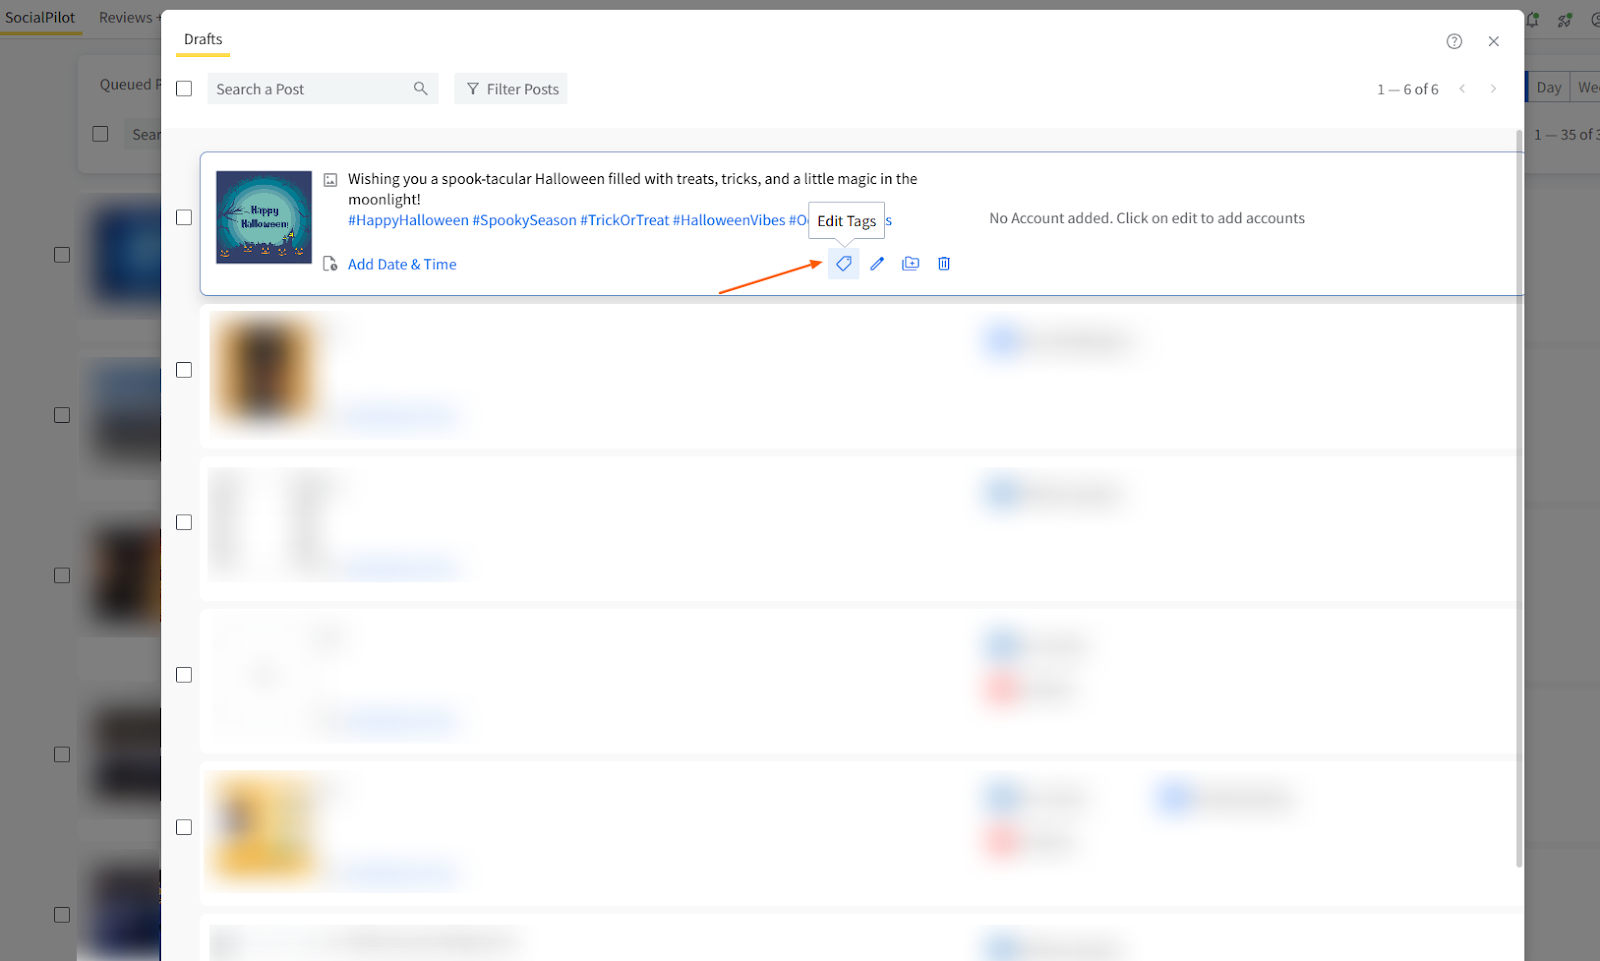
Manage Posts:
Add Tags to posts with different statuses, such as drafts, queued, delivered, or pending review. This helps maintain a clear overview of all content stages.
Analytics:
You can use the same tags added to posts in Manage Posts, Library, or Calendar to filter post-level metrics in Custom Reports. This helps you measure the performance of specific campaigns or themes and gain complete visibility from content creation to reporting.
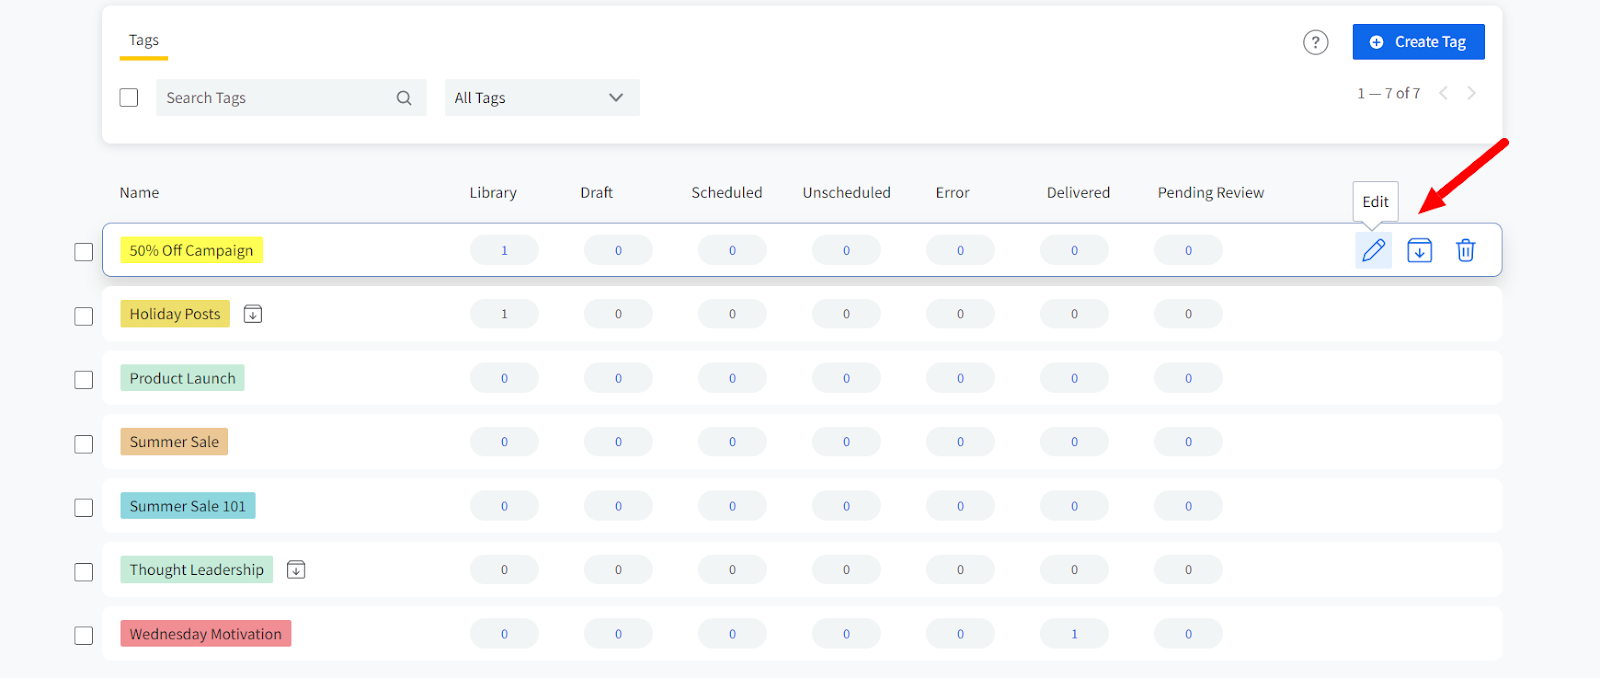
How To Manage Tags?
You can manage all tags from Setup → Tags in multiple ways.
a) Editing Tags
To edit a tag:
- Click on the tag you wish to edit.
- Update the name or color as needed.
-
Save your changes to reflect the updated tag across all related posts.

b) Archiving and Unarchiving Tags
- Archiving Tags: If a tag is no longer needed but might be used in the future, you can archive it. Archiving removes the tag from active use without deleting it.
- Unarchiving Tags: If you need to reactivate an archived tag, go to the 'Archived Tags' filter and select 'Unarchive.' The tag will be restored for active use.
c) Deleting Tags
To permanently delete a tag:
- Navigate to the Tags section and select the Delete option from the tag menu.
- Confirm your action. Be cautious, as this action cannot be undone, and once deleted, the tag is permanently removed from your account.
How To Filter Posts With Tags?
Tags are one of the prime criteria that users can filter their content with.
Here are the places in the SocialPilot app where you can use tags to filter content:
- Manage Post queues (Queued posts, Unscheduled Error, Delivered, Pending Review)
- Calendar
- Drafts
- Library
- Social Inbox
- Notes
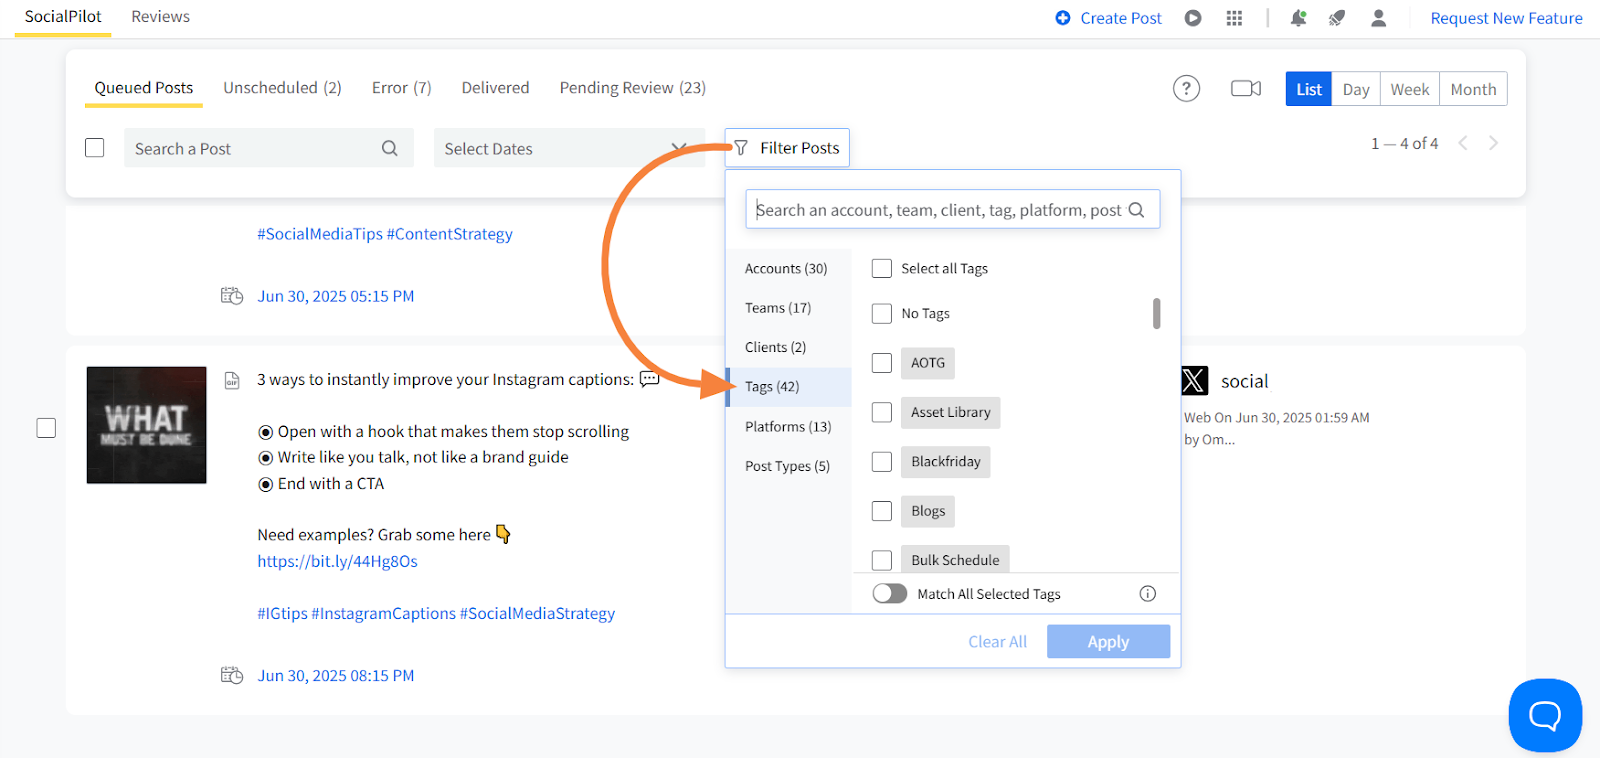
In any of the pages mentioned above, when you go to Filter, pick Tags from the given list of filters. You can select more than one tag to filter out posts.
At the bottom of the tags list, you will find a toggle.
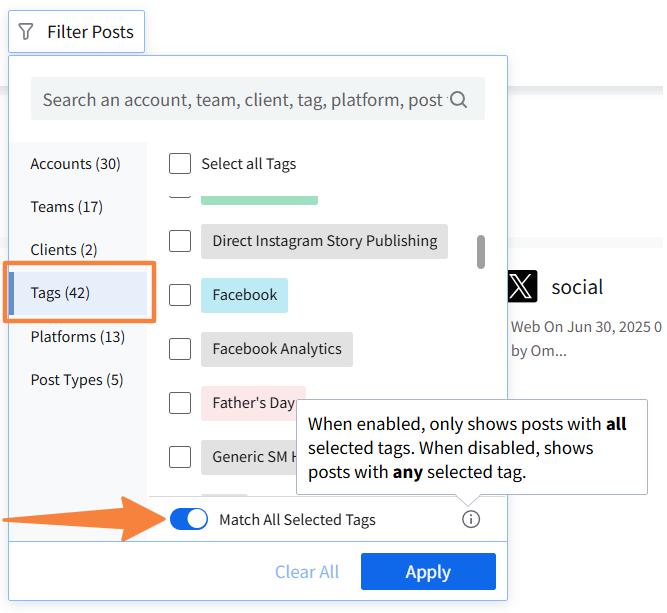
If you keep it in the off position, any post that matches even a single one of the selected tags will be filtered out. But if you switch the toggle on, the post that has all the selected tags will be filtered out.
How to Use Tags in Analytics
You can also use Tags in Custom Reports to track campaign performance and measure how each campaign performs over time. The Tags you’ve added to posts in Manage Posts, Library, or Calendar can be used here to filter post-level metrics for those campaigns.
Let us see how to do it:
1. Go to the Analytics section from the left-hand sidebar and click on Reports.
2. Select an existing report or create a new one for any connected account.
3. Once inside the report, go to the Posts section.
Note: Each metric block under the Posts section will now have a Tag Filter icon at the top-right corner. Some blocks showing individual metrics may not have this filter.
4. Click the Tag Filter icon to open the Tag selection dialog.

5. Select one or more Tags from the list. The data in that block will automatically update to show metrics only for posts with the selected Tags.

Selected Tags will also appear in Preview and PDF exports, so you can easily identify which filters were applied.