How to Create and Manage Custom Feedback Forms in SocialPilot Reviews?
Introduction
Customer feedback helps you understand what’s working and where improvements are needed. But when feedback is collected through generic forms, responses can be hard to organize and even harder to act on.
With Feedback Forms in SocialPilot Reviews, you can create structured, branded, and customizable forms to collect customer input across multiple touchpoints. You can design your own questions, control how feedback flows, and reuse the same form across campaigns, QR codes, widgets, and website review buttons, making it easier to manage feedback consistently across locations.
You can also check out this walkthrough video to see how it works:
In This Article
- How To Create a Feedback Form
- How To Customize Pages
- How To Add Questions and Sections
- How To Set Section Visibility
- How To Manage Review Links
- How To Preview and Publish a Form
- How To Manage Existing Forms
How To Create a Custom Feedback Form
To create your first feedback form-
-
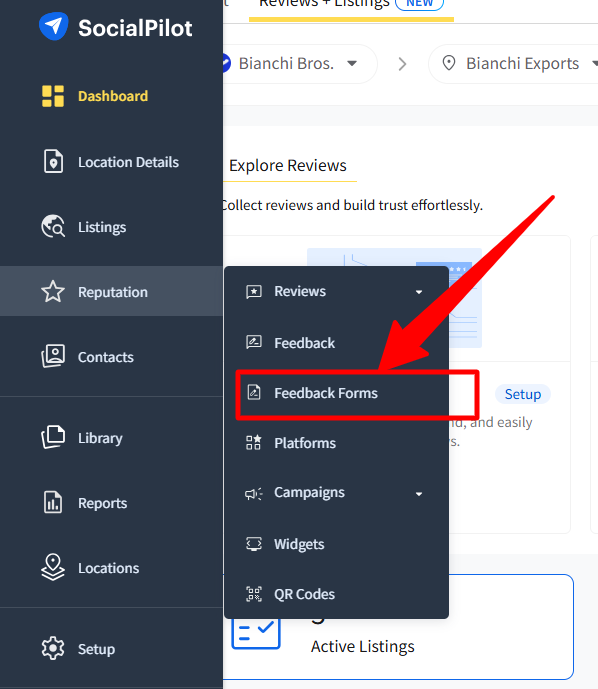
Go to side bar, click on Reputation, and then select Feedback Forms.
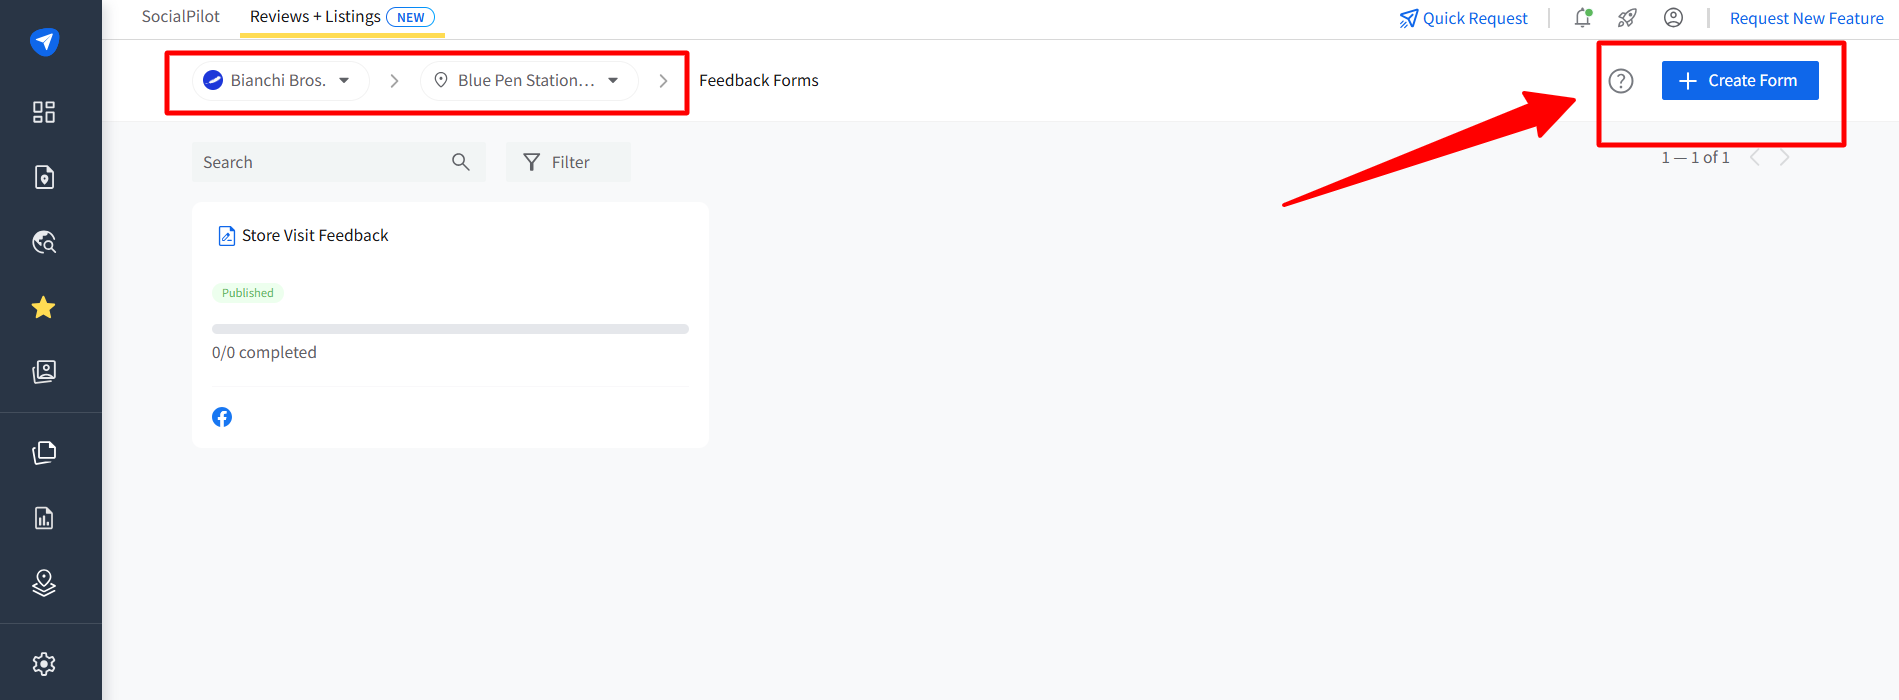
- Use the Brand and Location selectors at the top to choose where the form will belong.
-
Click on Create Form to get started.
-
Then select Start from Scratch to build a new feedback form manually.
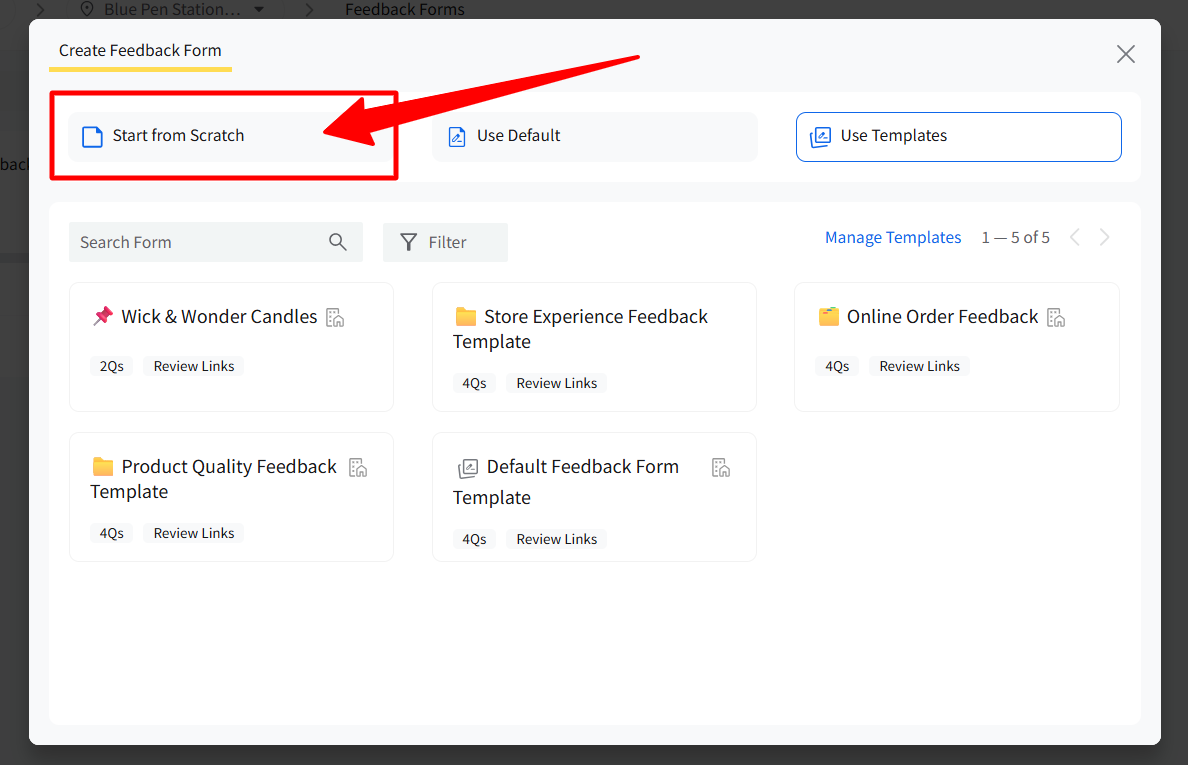
You can also choose Use Default to create a form using the location's default feedback form setup or Use Templates to create a form from a saved template.


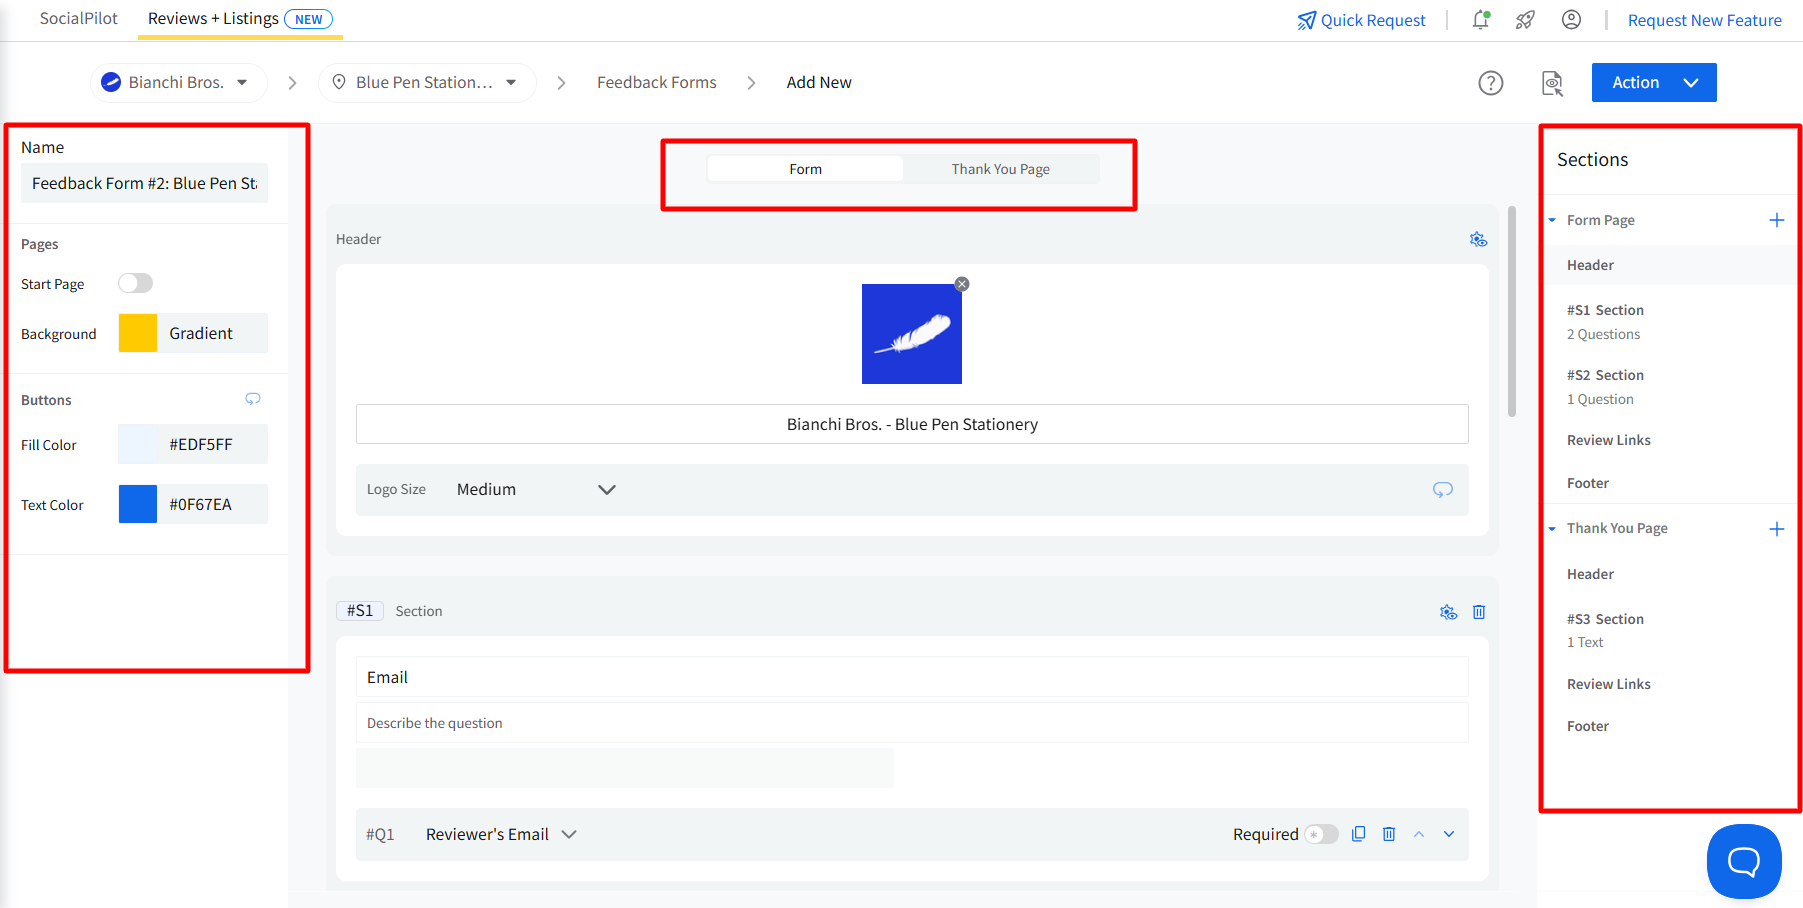
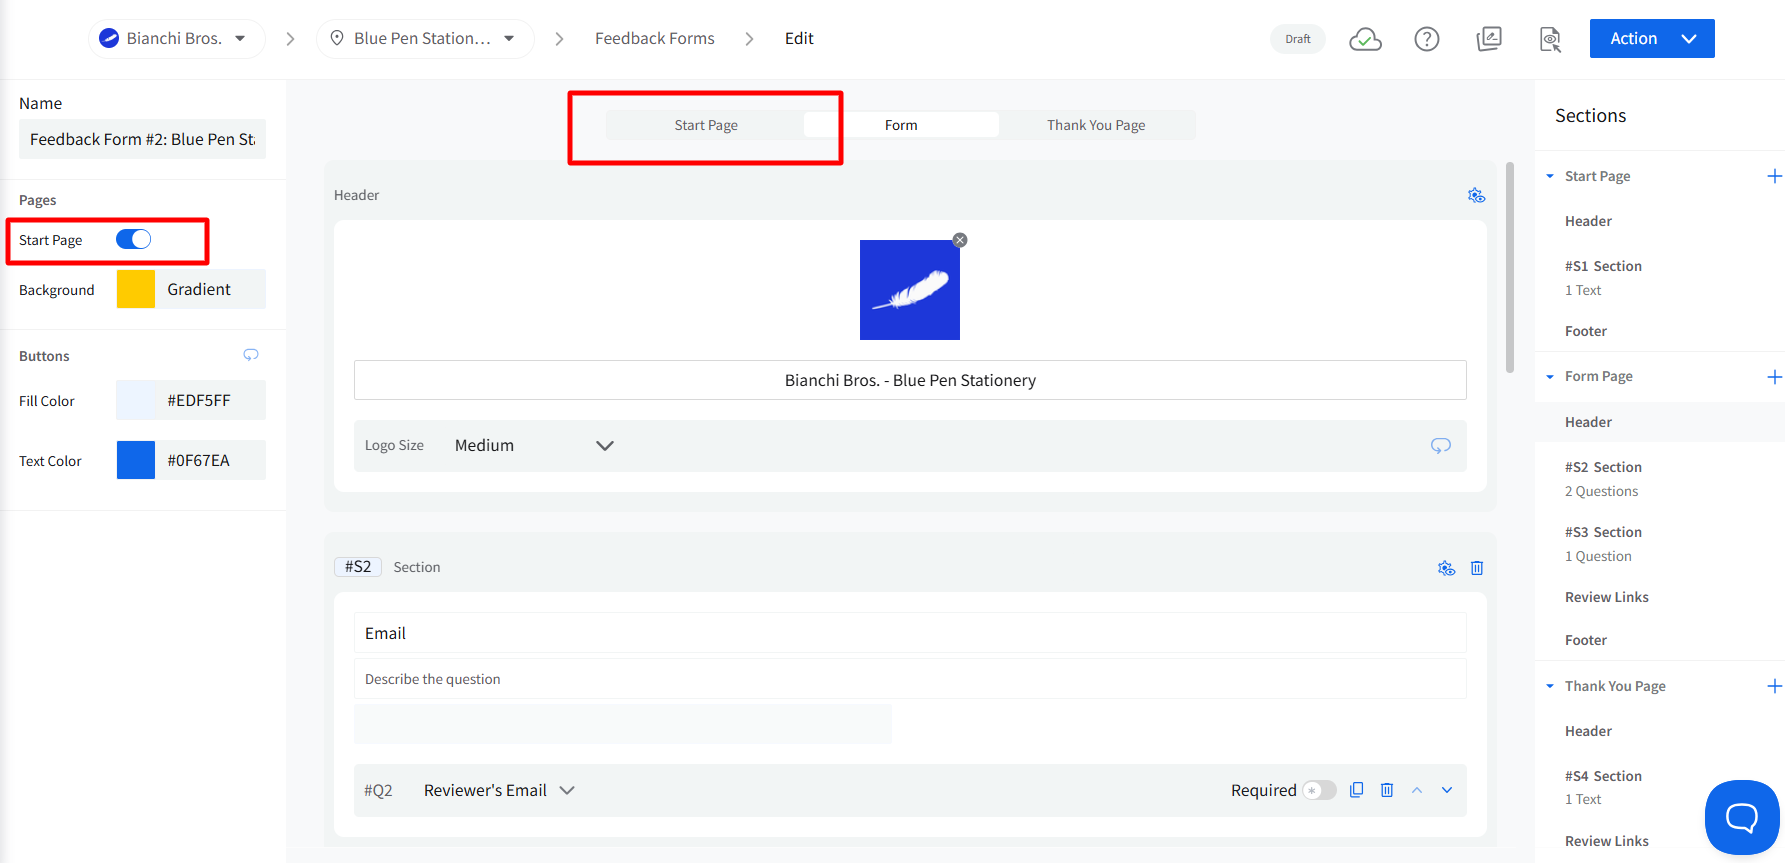
A Custom Form Builder will open, which is divided into three parts:
- Left panel (Setup): Rename the form by changing the default system-generated name, or use a custom name, background color, and button color.
- Center (Builder): Add and arrange questions in sections that customers will see and respond to.
- Right panel (Sections map): View and manage all sections across pages.
You can switch between the Start Page, Form Page, and Thank You Page using the tabs at the top.
How To Customize Pages
Start Page
The Start Page is optional and appears before customers begin answering questions. In the left-side panel, you can decide whether to include or exclude it. By default, the toggle for the start page will be turned off.
It is fully customizable, and you can easily:
- Edit or hide the header.
- Add sections with text or questions.
- Reorder or delete sections as needed.
- Edit the footer if required.
You can click the preview button in the top-right corner, beside the action button, to see how your form will appear to customers and make changes before sending it out if you are not satisfied with anything.
Use this page to introduce the form or explain why feedback is being collected.
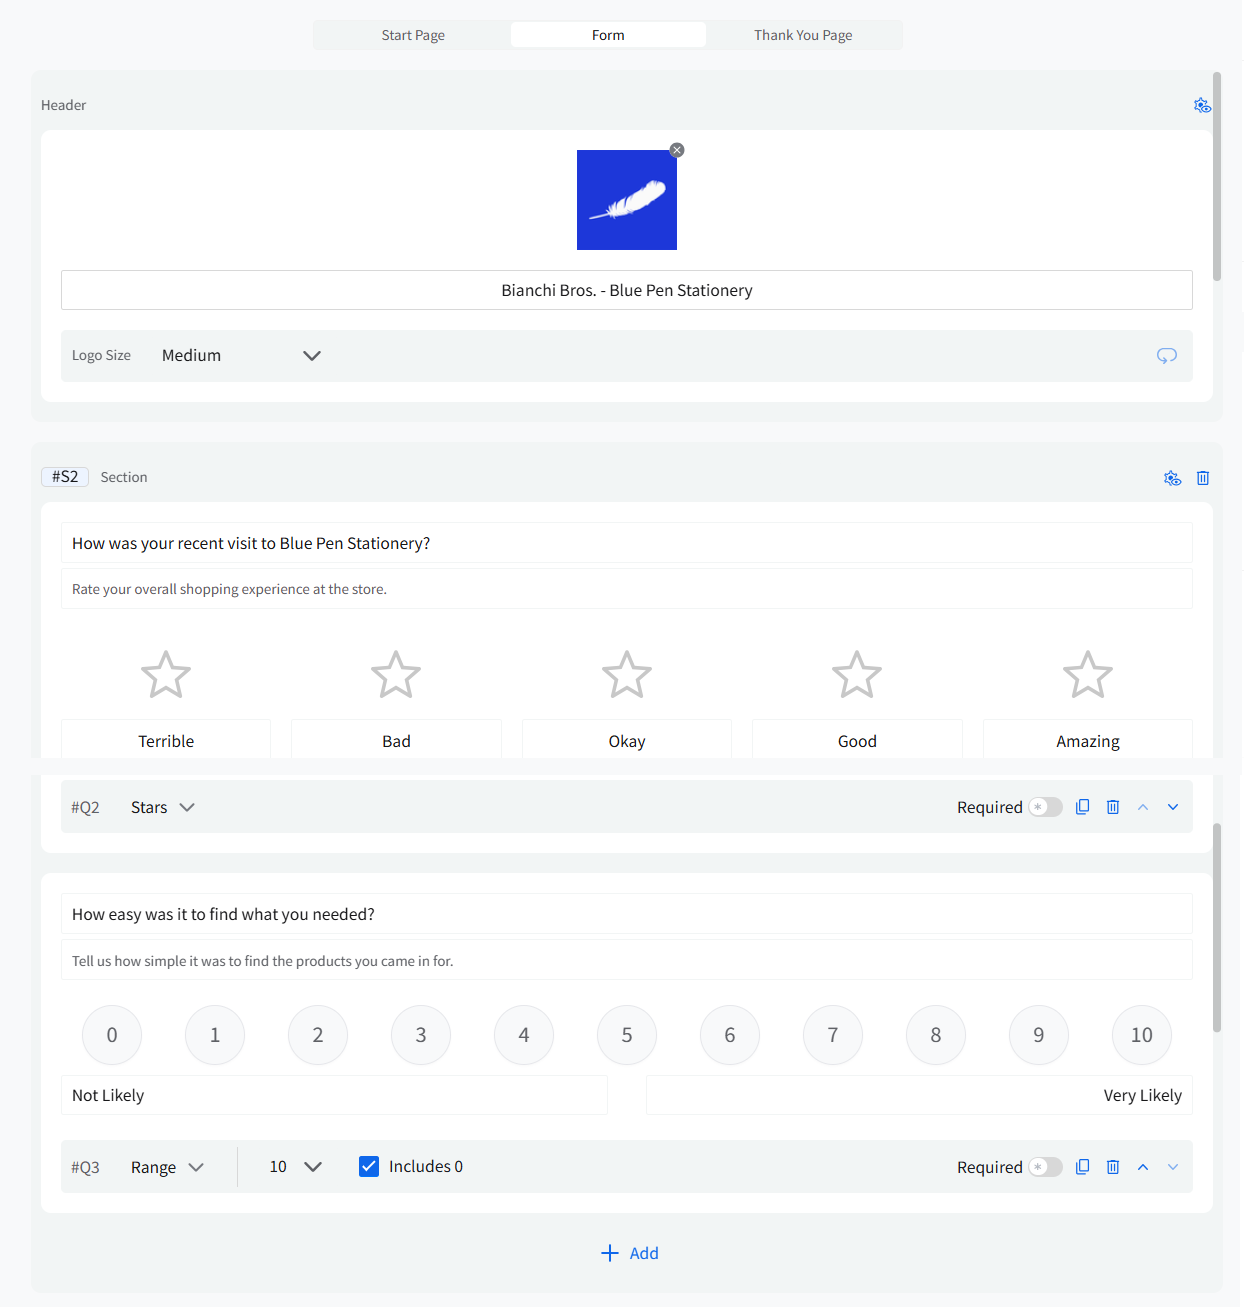
Form Page
The Form Page contains the questions customers respond to.
At the top, you’ll see the header, which automatically pulls in your brand logo and name. You can edit or hide it.
Below the header is your first section. You can continue to add questions in the same section or divide the form into multiple sections with different questions.
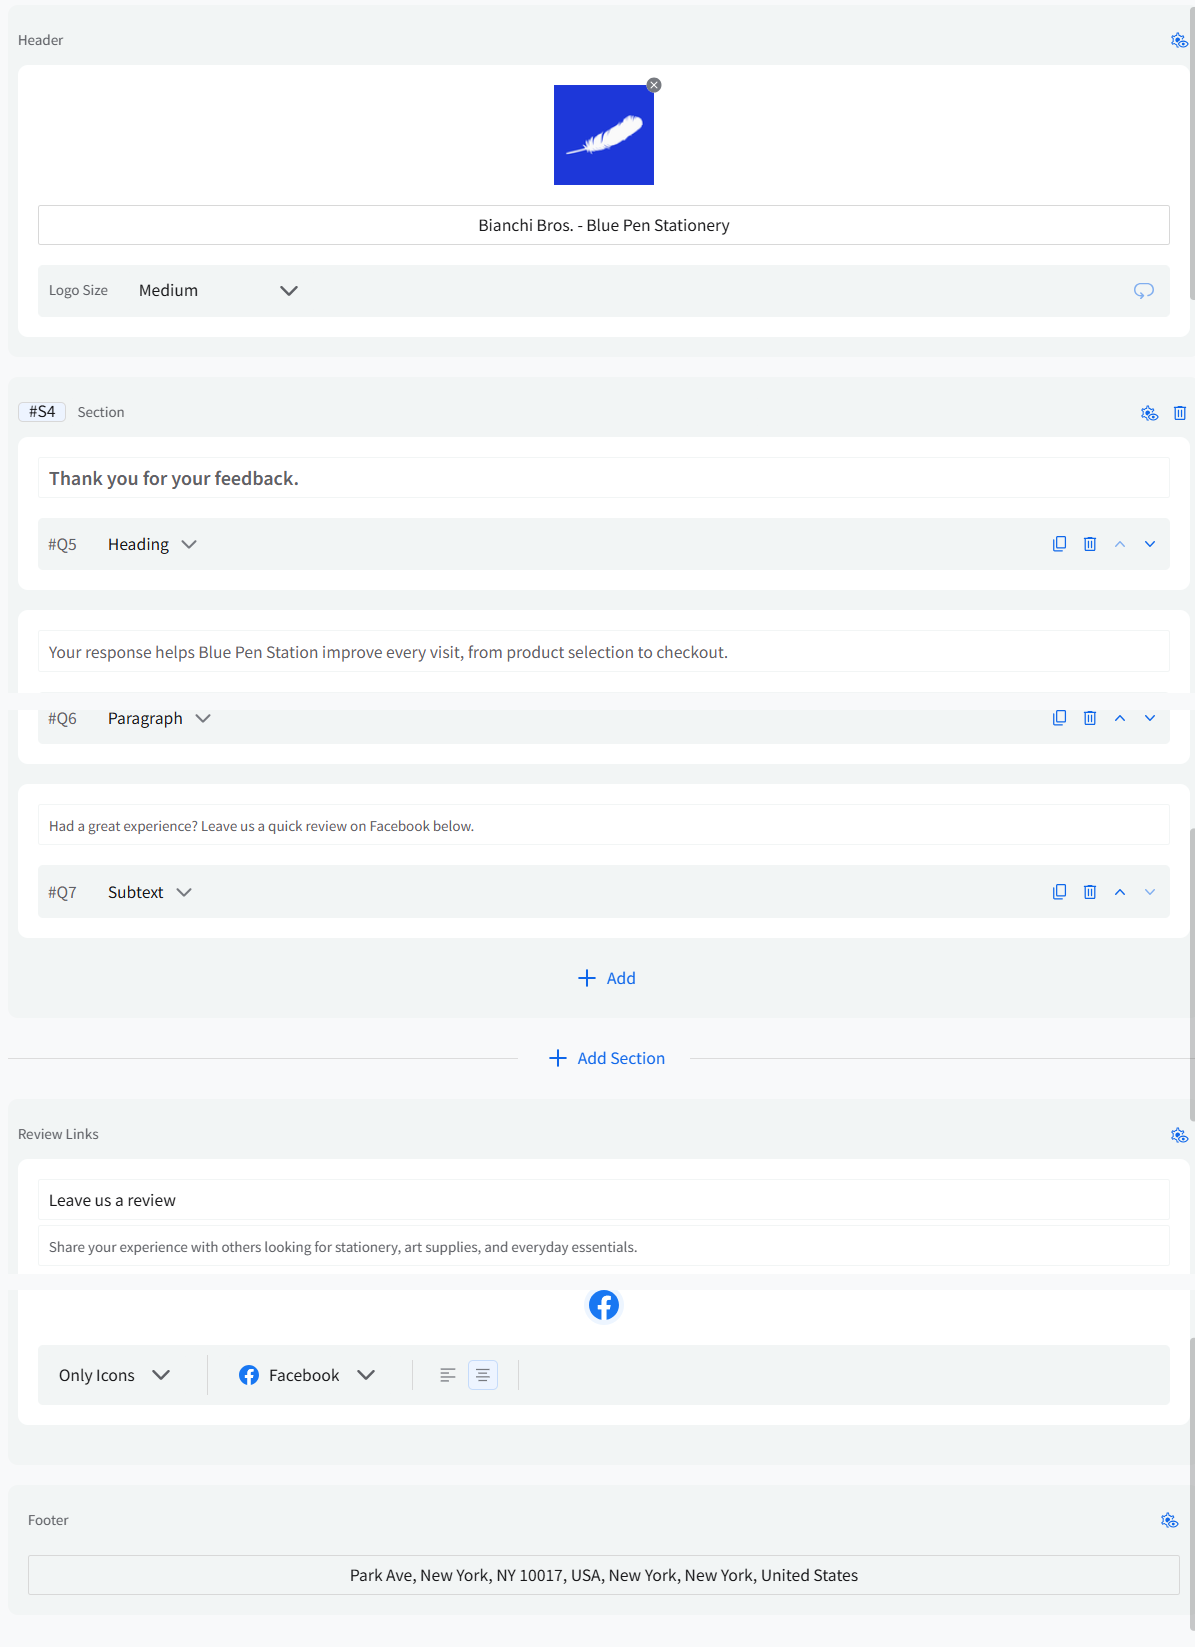
Thank You Page
The Thank You Page appears after customers submit feedback.
You can decide how you would like it to appear:
- Add a thank-you message. It can be followed by a heading, subtext, or a paragraph.
- Customize the header, sections, review links, and footer.
This page always serves as the completion screen for the form.
How To Add Questions and Sections
On the Form Page:
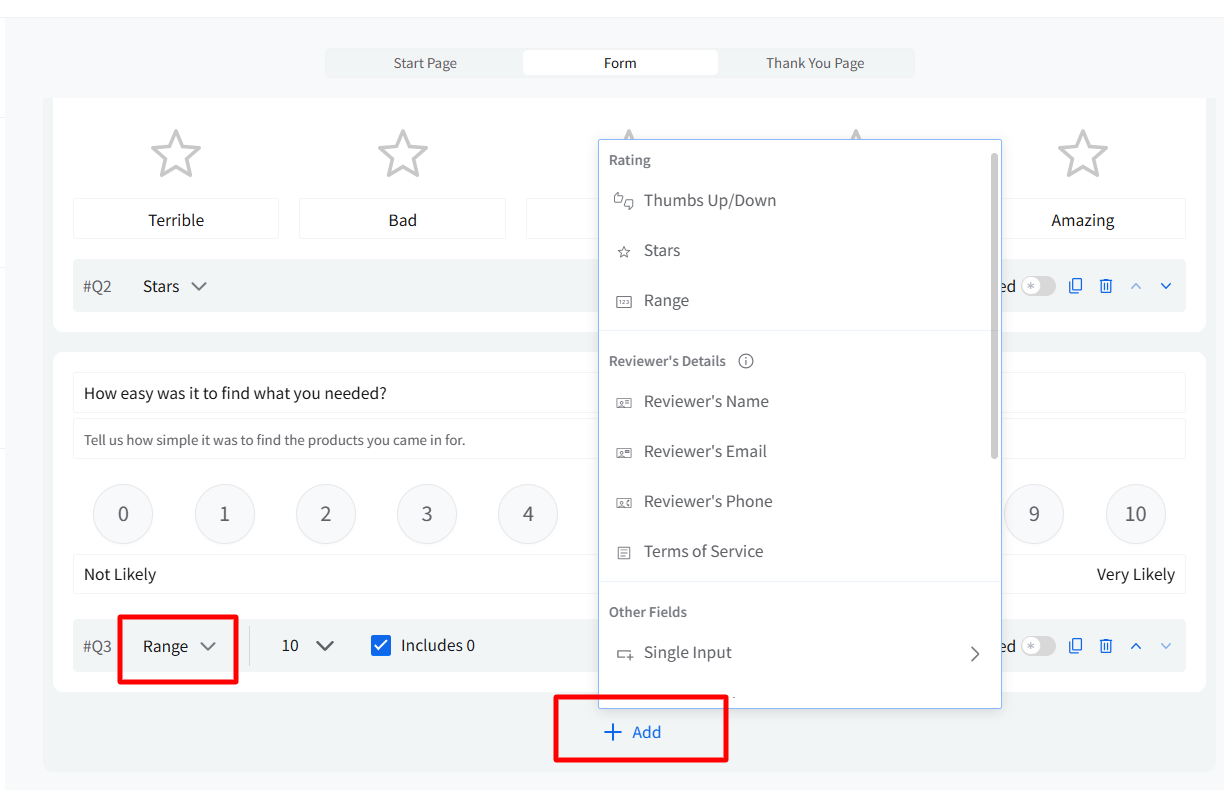
- Click inside a question field to enter your question text.
- Select a question type from the drop-down menu, such as rating, short answer, long answer, checkboxes, or drop-down.
Each question includes controls to:
- Duplicate
- Delete
- Mark as required
- Move up or down

To add more questions within the same section, click Add below the existing question.
To organize your form into multiple parts, click Add Section. Sections help group related questions and control how feedback flows. You can reorder questions and sections at any time.

You can choose from different question types to build feedback forms that fit your needs and audience. To learn more about all the question types you can create within Feedback Forms, refer to the Feedback Forms Question Types help guide here.
How To Set Section Visibility
Each section includes visibility settings. This option is available at the top right corner of each section, next to the delete section option.

Click the settings icon on a section to choose:
- Always shown
- Always hidden
- Shown only if
- Hidden only if
Pick the condition of your choice and set rules based on answers from previous questions.

For example, show follow-up questions only after a low rating. This helps keep forms focused and relevant. You can group multiple conditions using AND within a group and combine groups using OR to control when a section appears.
How To Manage Review Links
Scroll to the Review Links section at the bottom of the Form, Start, or Thank You Page.
Here, you can:
- Edit the message shown to customers.
- Choose which review platforms to include.
- Control how review links appear.

The review link title/label is optional. You can leave it blank if you do not want to add a custom label.
You can also use Custom Feedback Forms purely as surveys without prompting customers to leave a public review.
To do this:
- Set the Review Links section visibility to Always Hidden on both the Form Page and the Thank You Page.
This ensures no review platforms are displayed at any stage of the form.
If you choose “Shown only if” or “Hidden only if” for the Review Links section on the Form Page, the Review Links section on the Thank You Page will automatically switch to Always Shown.
Editing this setting on the Thank You Page will remain disabled until the Form Page visibility is changed back to either Always Shown or Always Hidden.
This setup allows you to control whether your form functions as a review collection tool or a private survey.
How To Preview and Publish a Form
When your form is ready:
-
Click Preview to see the full flow from Start Page to Thank You Page.
If anything needs your attention, the Sections panel will highlight it so you can quickly jump to that section and fix it.
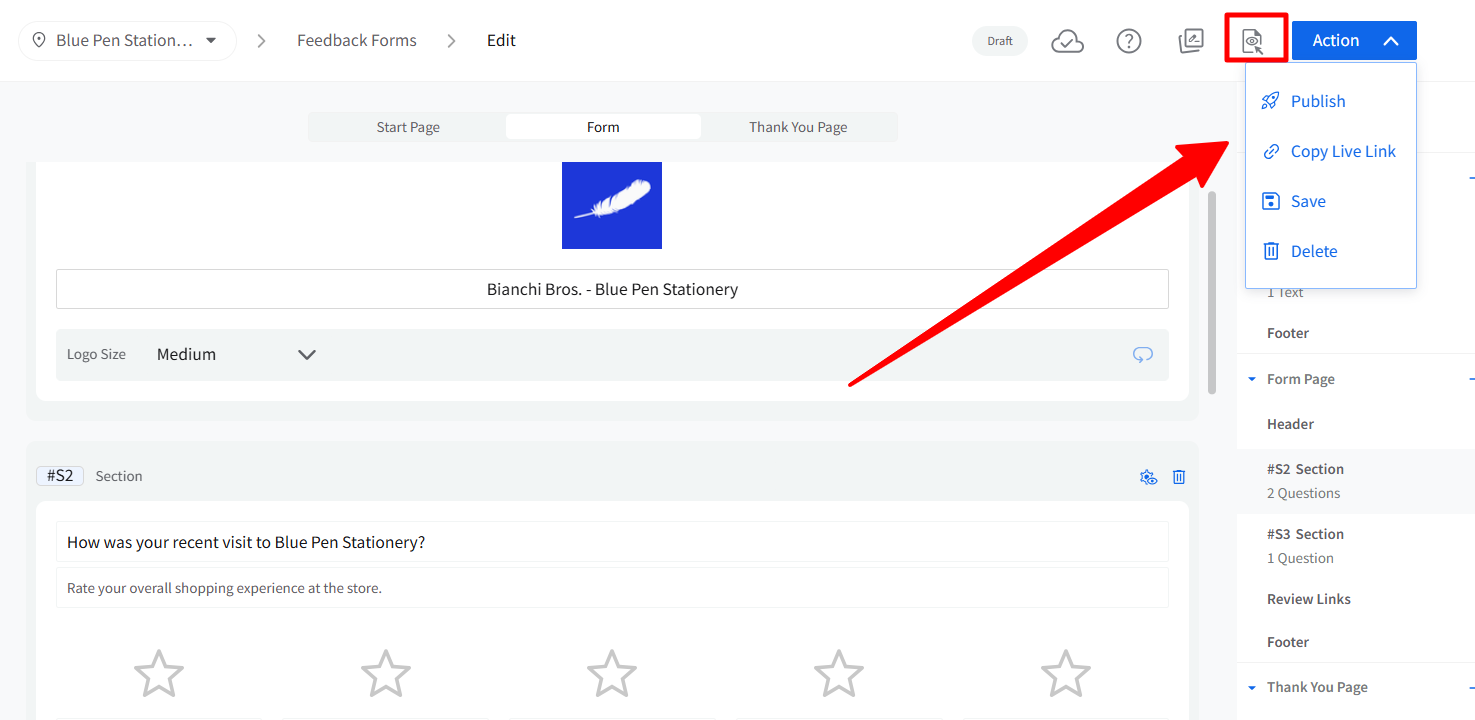
- Open the Action menu in the top-right corner once you are satisfied with your created form.
From here, you can:
- Publish the form
- Copy the live link
- Save as draft
- Delete the form
Publishing makes the form live instantly.
The same form link can be reused across campaigns, QR codes, widgets, or shared directly.
How To Manage Existing Feedback Forms
Go back to Reputation and click on Feedback Forms to view all created forms.
Each form card shows:
- Form status
- Completion count
- Linked review platforms
- Where the form is currently used (campaigns, widgets, or QR codes).
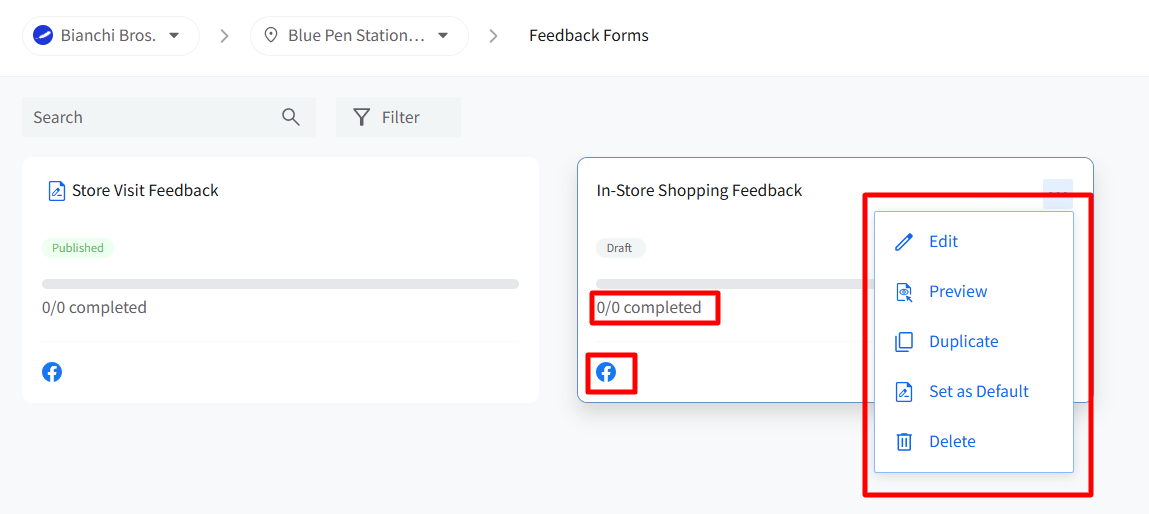
From this screen, you can:
- Edit or preview forms
- Duplicate forms
- Unpublish or republish forms
- Search or filter forms by status or platform
- Set a form as default
- Delete forms
From the three-dot menu on a form card, you can set any form as the default form for that location. The default form is used as the starting form in campaigns, QR codes, and widgets.
A default form cannot be deleted directly. To delete it, first set another form as the default.
This helps you manage feedback forms across multiple locations and reuse existing forms when needed.
Note: Access to create, edit, delete, or manage feedback forms depends on the user's role and permissions. Client users without form management access can view published forms and copy the live link.
How To Turn Your Feedback Forms Into Templates
Any feedback form can be saved as a template and reused as the starting point for new forms.
To save a form as a template, click the Feedback Form Templates icon in the toolbar and select Save as Template.
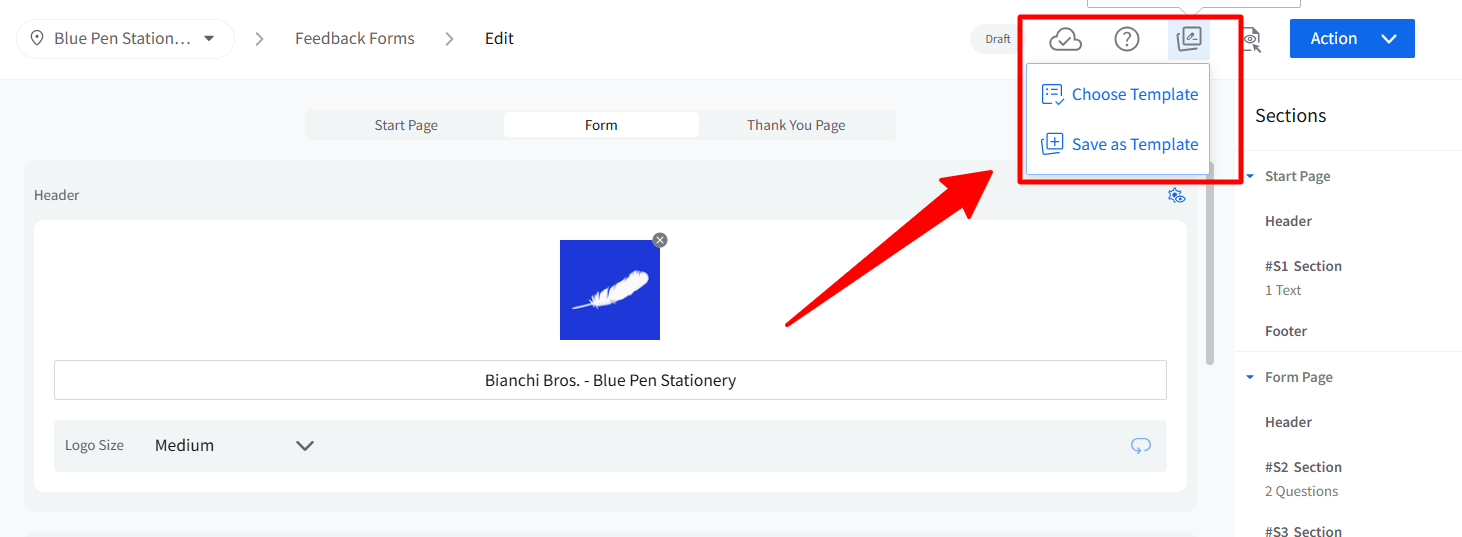
To apply a saved template to a new form, click the same icon and select Choose Template. This shows all your saved templates. Selecting one applies its questions, structure, and review link setup to the form you are building.
Note: Once a form is created from a template, it becomes independent of that template. Changes made to the form do not affect the template, and updates made to the template do not affect forms that were previously created from it.
For full instructions, including brand scope, header and footer settings, and managing your template library, see How to Save and Use Feedback Form Templates in SocialPilot Reviews.
Related Articles: